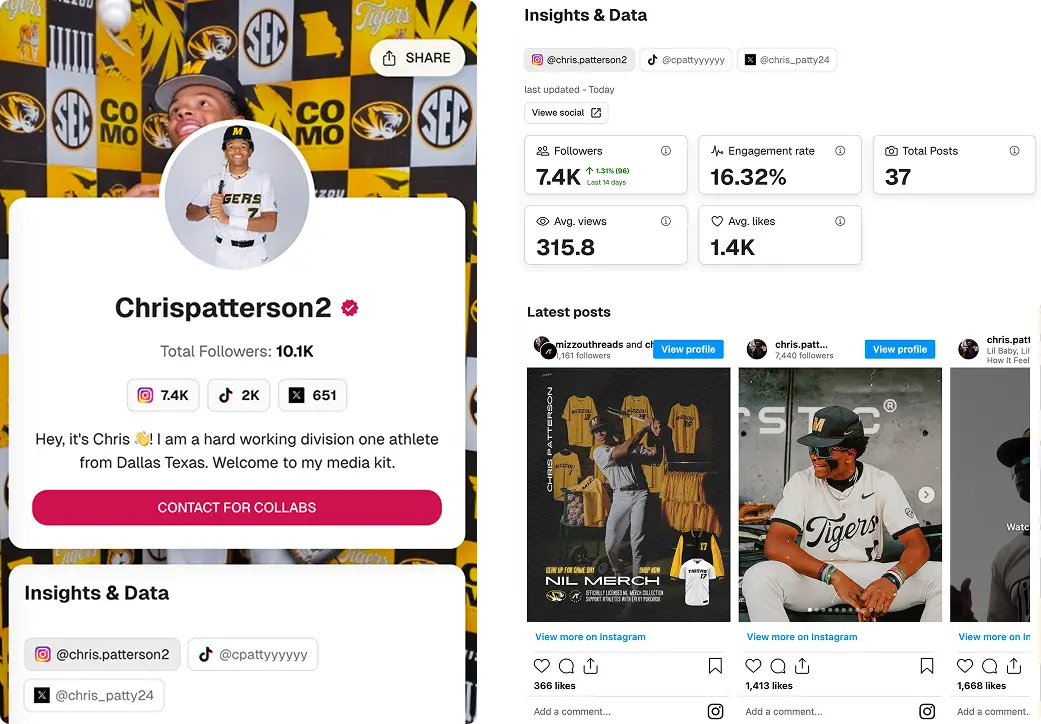
Influencer Media Kit: How to Create One and Real Examples
Create your influencer media kit online in minutes. Build a professional kit that showcases your work and wins brand partnerships.
Trusted by 0 creators
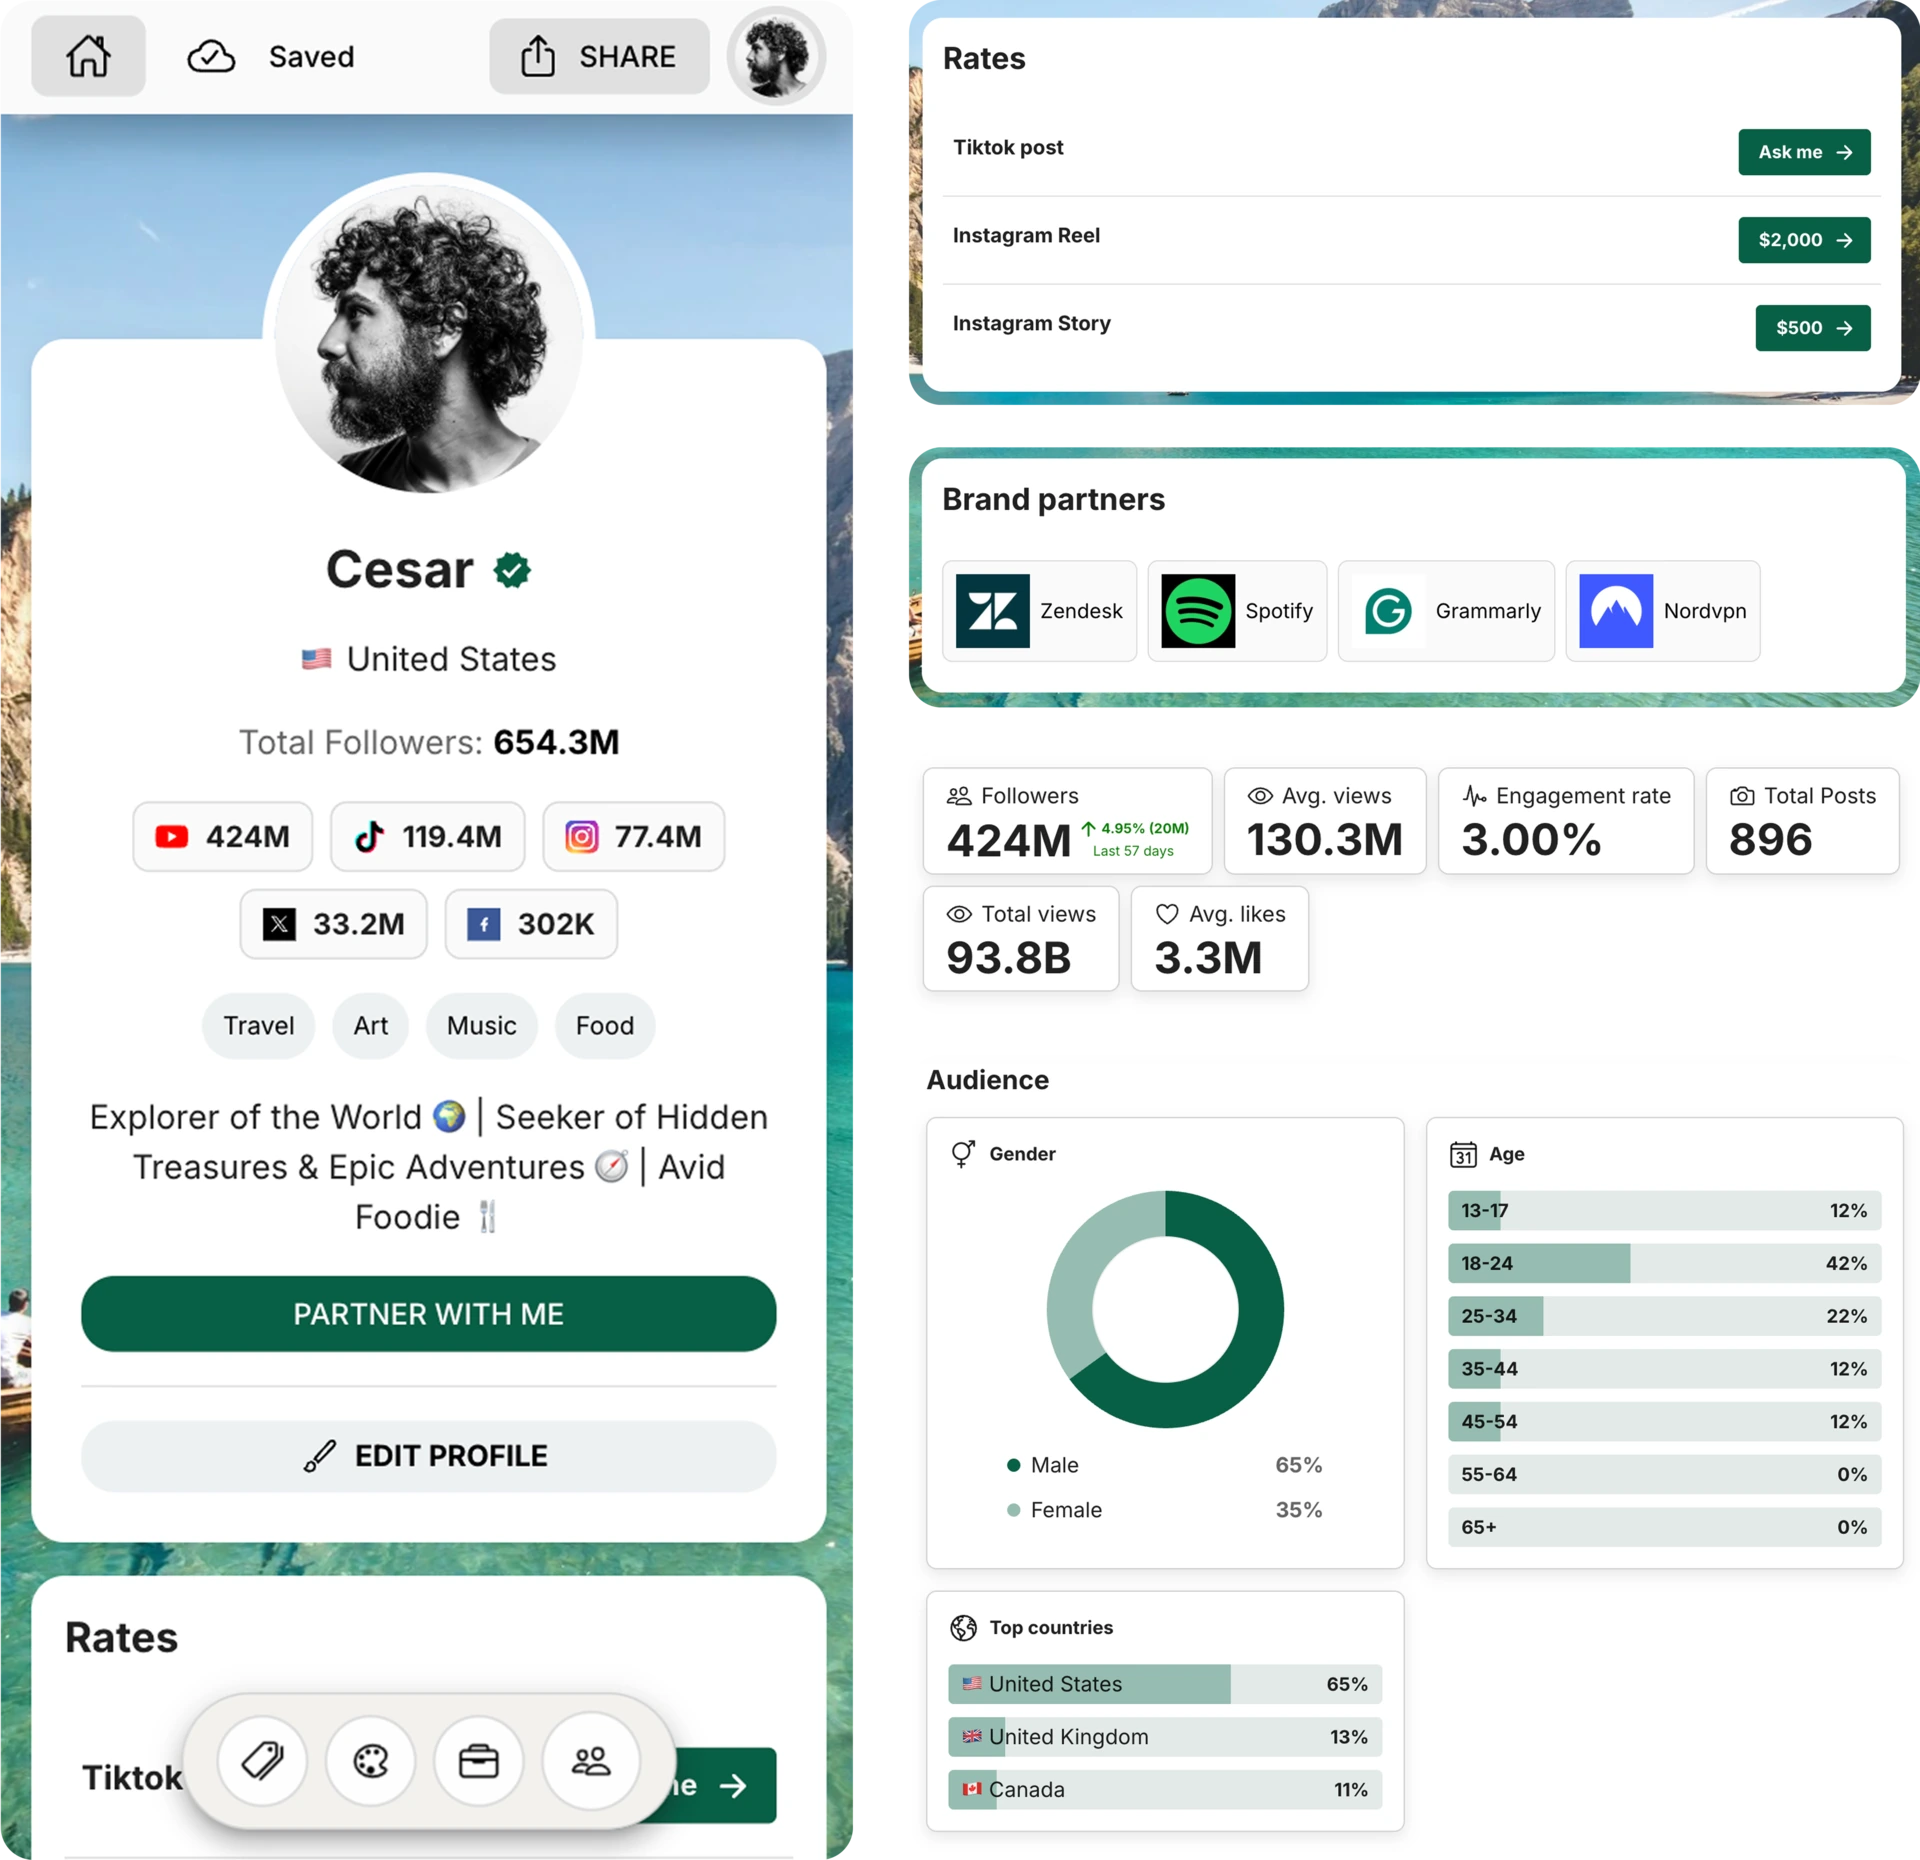
This guide shows you how to create an influencer media kit that brands can quickly review and use to evaluate collaborations. It’s designed for creators who want a clear, professional way to present their audience, performance, and past work without relying on screenshots or long explanations.
You’ll learn how to structure your media kit, what brands actually look for when reviewing creators, and how to share it effectively during outreach. Whether you’re just starting out or already working with brands, this guide focuses on practical steps to help you look more credible, reduce back-and-forth, and increase your chances of landing partnerships.
What is an Influencer Media Kit?
An influencer media kit is a professionally designed document or digital portfolio that presents your personal brand, audience, and past collaborations. Its purpose is simple: help brands understand who you are and why you’re a strong match for their next campaign.
It typically includes your bio, audience demographics, engagement metrics, content examples, rates, and contact details. A well-crafted media kit gives brands everything they need to assess your relevance at a glance, making your collaboration proposals clearer, stronger, and more professional.
Influencer Media Kit vs Press Kit vs Rate Card
A media kit is built for brands and agencies, showcasing your audience, metrics, and creative style so they can evaluate partnerships. A press kit leans on PR storytelling (biography, milestones, awards, and notable press mentions). A rate card is a straightforward pricing sheet that lists deliverables and costs. Many creators keep a press kit for interviews, a media kit for sponsors, and a rate card to speed up negotiations.
Why Every Creator Needs a Media Kit in 2026
Brands expect data-backed pitches. A media kit puts your engagement rate, audience fit, and creative proof in one place, reducing back-and-forth and helping you close deals faster, even if you’re a nano or micro creator.
In 2026, campaigns move quickly and marketers need instant clarity. Sharing a polished kit shows you are easy to work with, keeps your positioning consistent across emails and DMs, and makes it simple for brands to forward your details internally.
What Industry Experts Say About Influencer Media Kits
- Sprout Social notes that putting reach, engagement, and pricing in one place helps marketers approve partners faster.
- Influencer Marketing Hub recommends highlighting audience fit and engagement metrics so brands can quickly shortlist creators.
- Later suggests adding case studies and social proof to prove campaign results and reduce objections.
What to Include in Your Influencer Media Kit
A strong influencer media kit isn't about looking flashy. It's about making it easy for brands to evaluate you quickly. Marketers review dozens of creators, so clarity, relevance, and proof matter more than design tricks.
Below are the essential sections every effective kit needs, plus guidance on how to structure each one.
About Me (Positioning, Not a Biography)
Write for brands, not a life story. State your niche, audience, and collaboration fit in 1-2 tight paragraphs, and skip generic claims or irrelevant details.
Key Metrics & Performance Indicators
Lead with the numbers brands compare: followers/subscribers, average reach or views, engagement rate, and posting cadence. Use averages and keep stats current; no screenshots.
Audience Demographics (What Brands Scan First)
Share the high-level audience fit: top countries or regions, age ranges, gender split, and language when relevant. Focus on what proves alignment instead of a data dump.
Past Brand Collaborations (Credibility Signals)
Show proof that others have trusted you. List recognizable or niche-relevant brands and add a brief result when you can. If you're new, highlight strong content, gifted, or affiliate work.
Content Examples & Case Studies
Curate 3-6 recent, brand-relevant examples. When possible, format them as mini case studies: goal, content delivered, and outcome.
Rates & Pricing (Optional but Strategic)
Share starting prices or packages if your pricing is consistent. If it varies, say rates on request. Either way, clarity helps filter and speeds negotiation.
Contact Information & Next Steps
Make the next step obvious: a professional email, management contact if applicable, and a short CTA like Open to collaborations.
When your kit is clear, current, and easy to scan, brands can evaluate faster and move toward collaboration with fewer follow-ups.
How to Create Your Media Kit Faster With CreatorsJet
Creating an influencer media kit doesn’t have to be complex or time-consuming. With CreatorsJet, it takes just minutes. The platform handles the setup so you can focus on your content, while your stats update automatically to stay accurate for brands. Your media kit stays up to date in real time and is easy to share with a single link. Let’s walk through the process step by step.
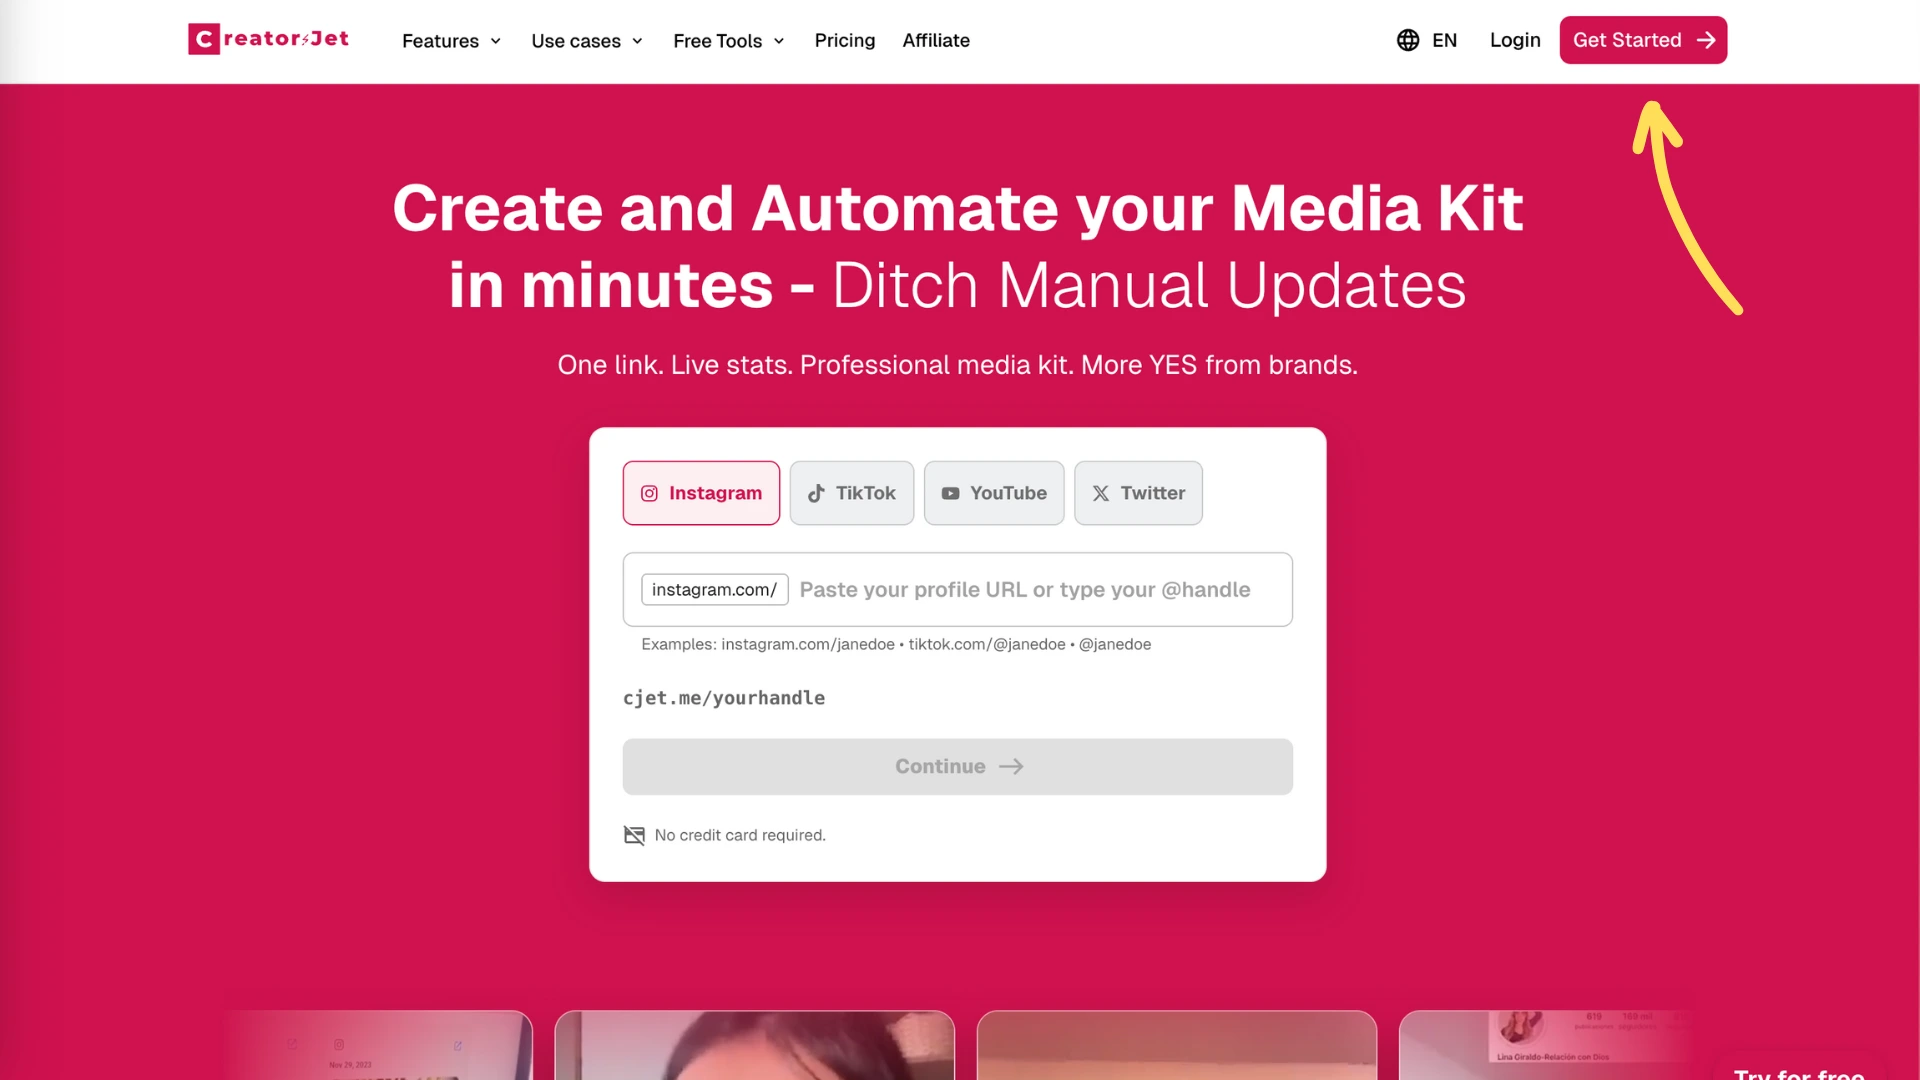
Step 1: Create your account
Click “Get Started” to set up your influencer media kit.
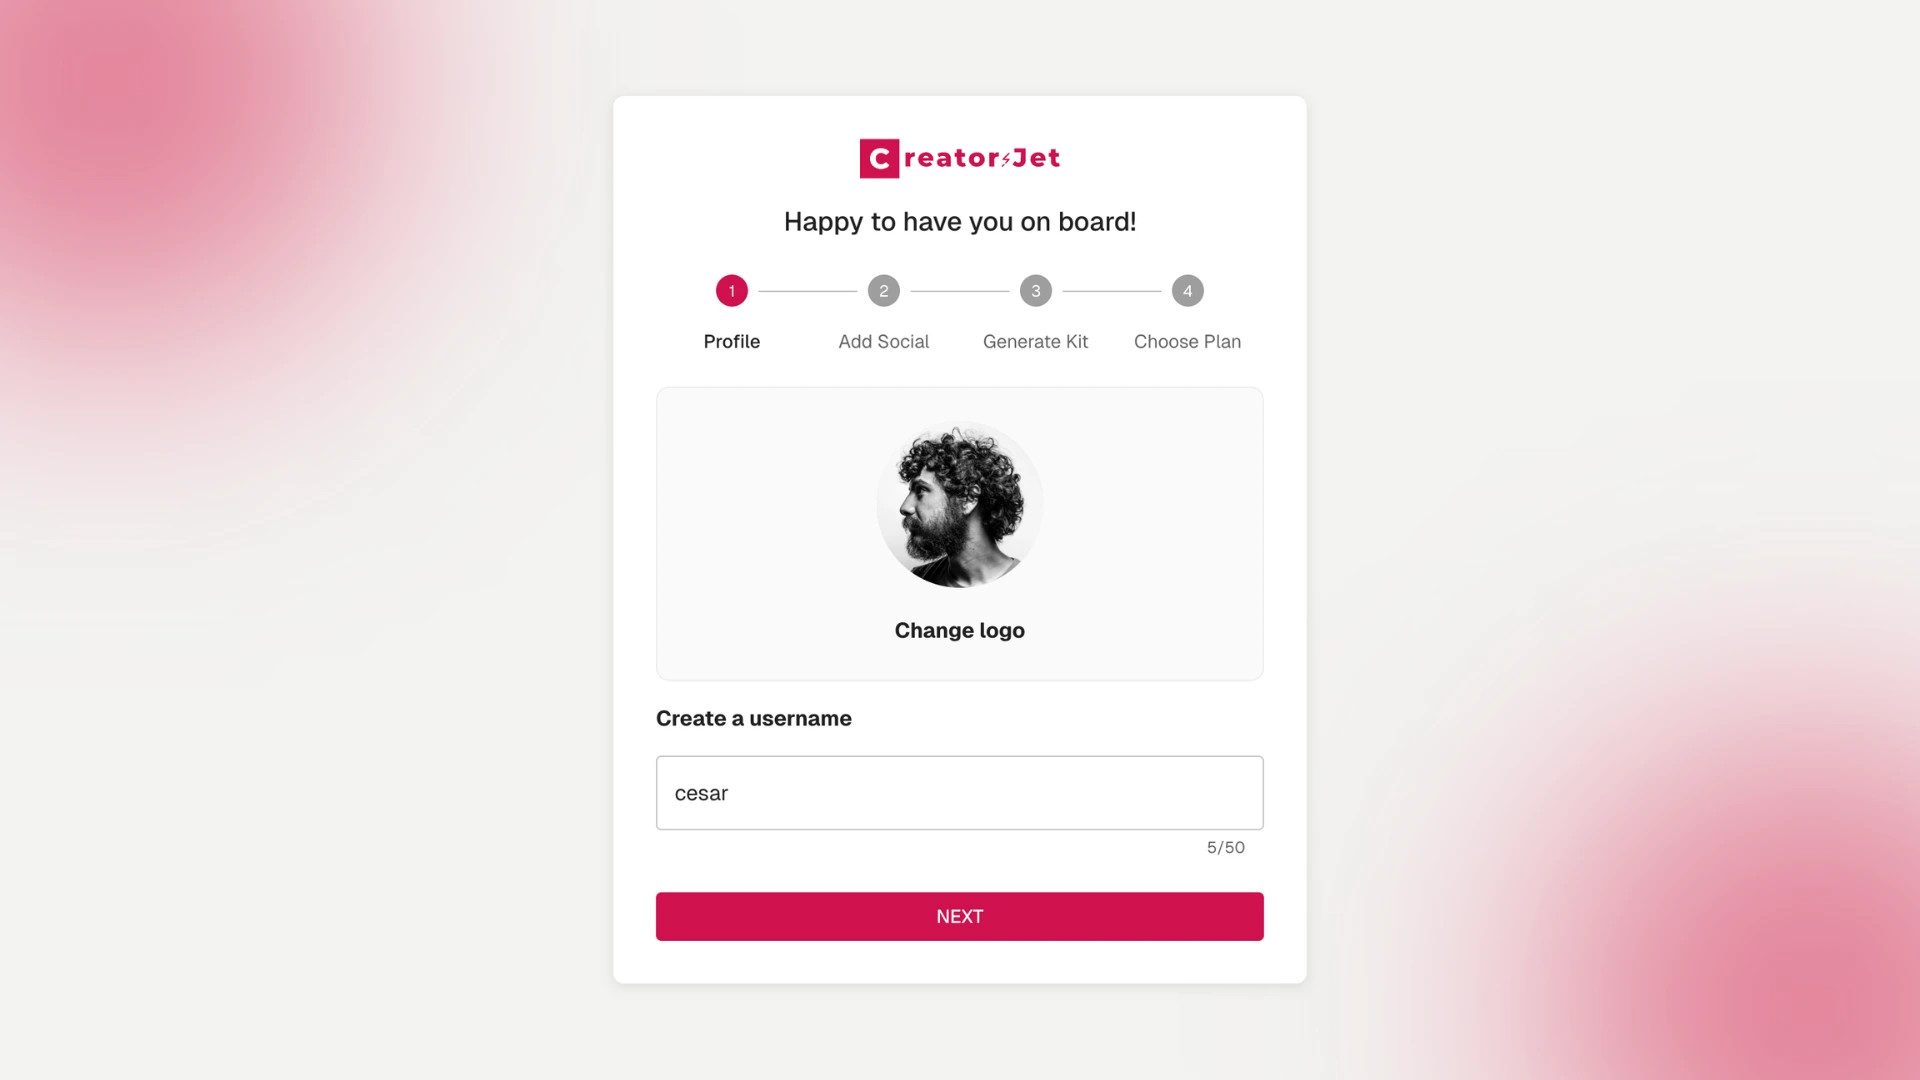
Step 2: Onboarding process
Choose a username, photo, add a social, generate your kit, and choose a plan, then click “Finish”.
Step 3: Link Your Social Media Accounts
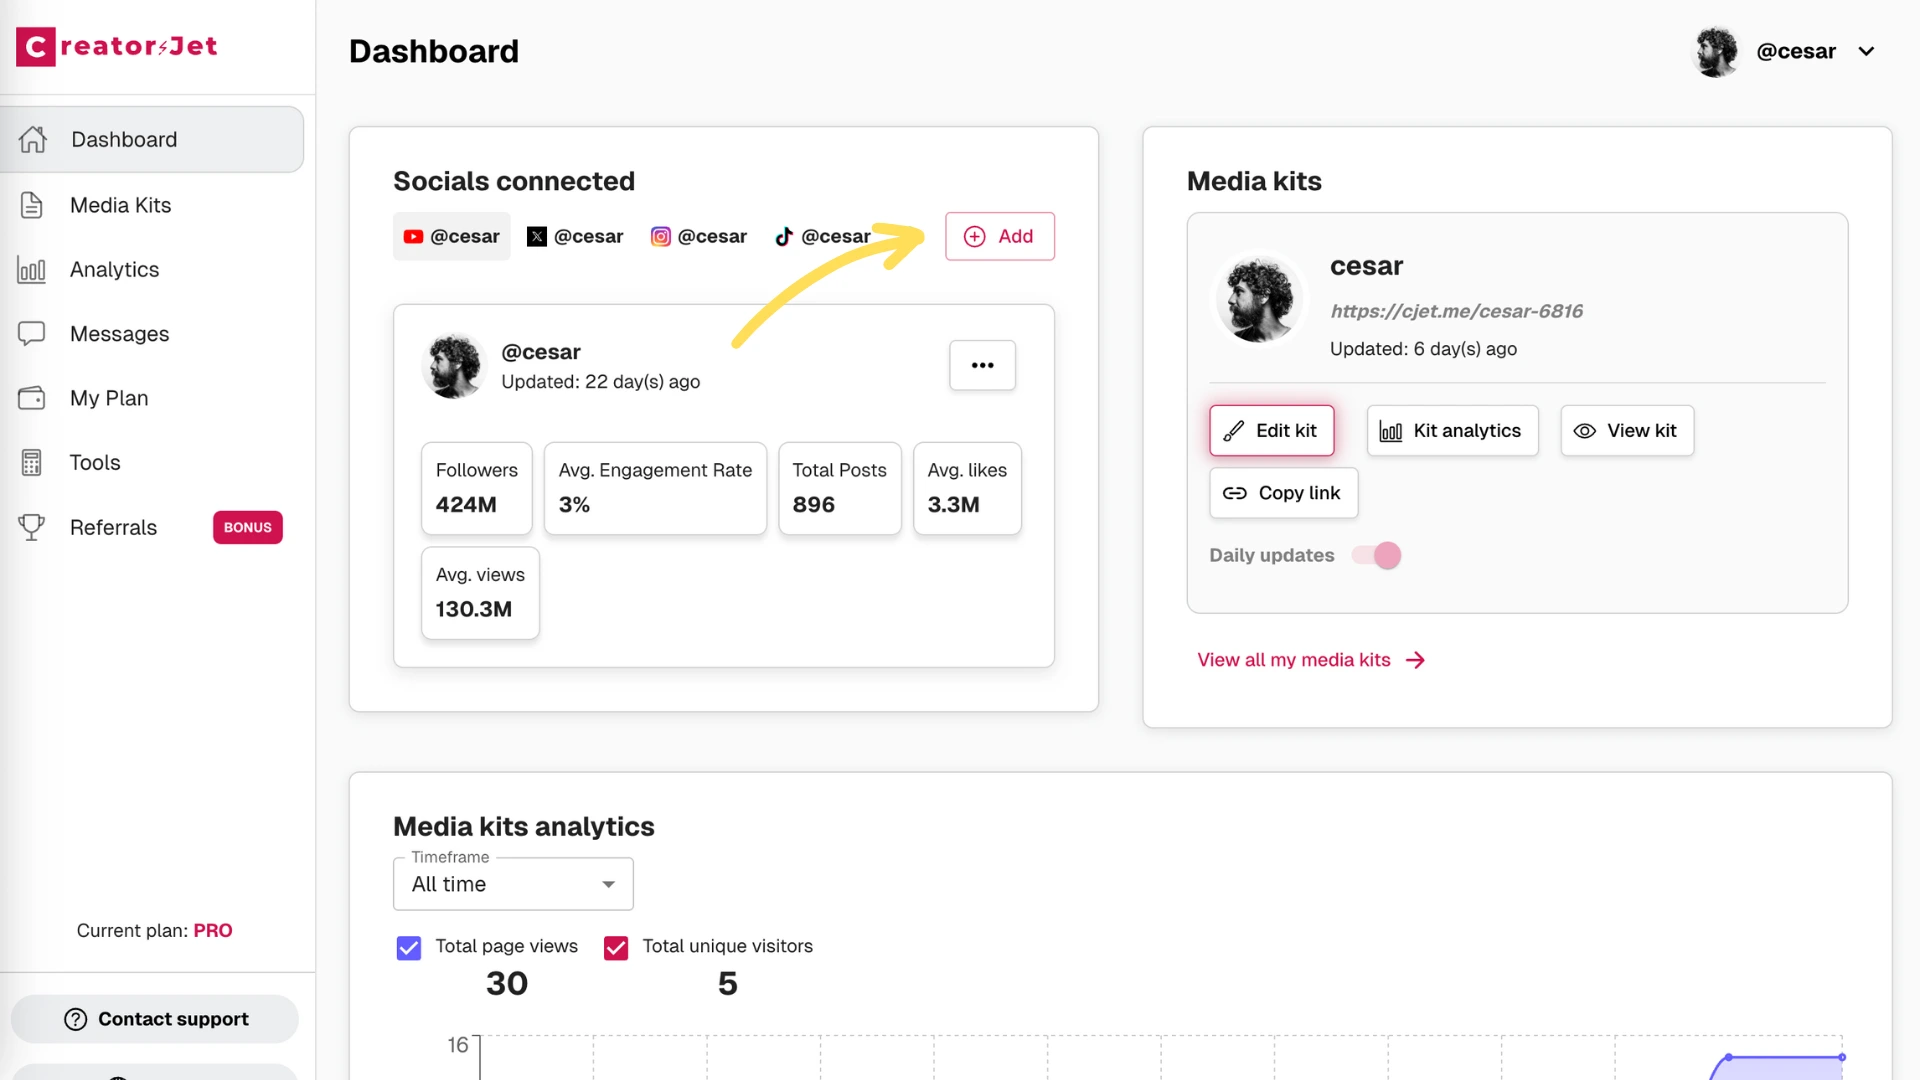
Click on "Add Social." This will open the Connect Socials section where you can choose a platform and enter your handle.
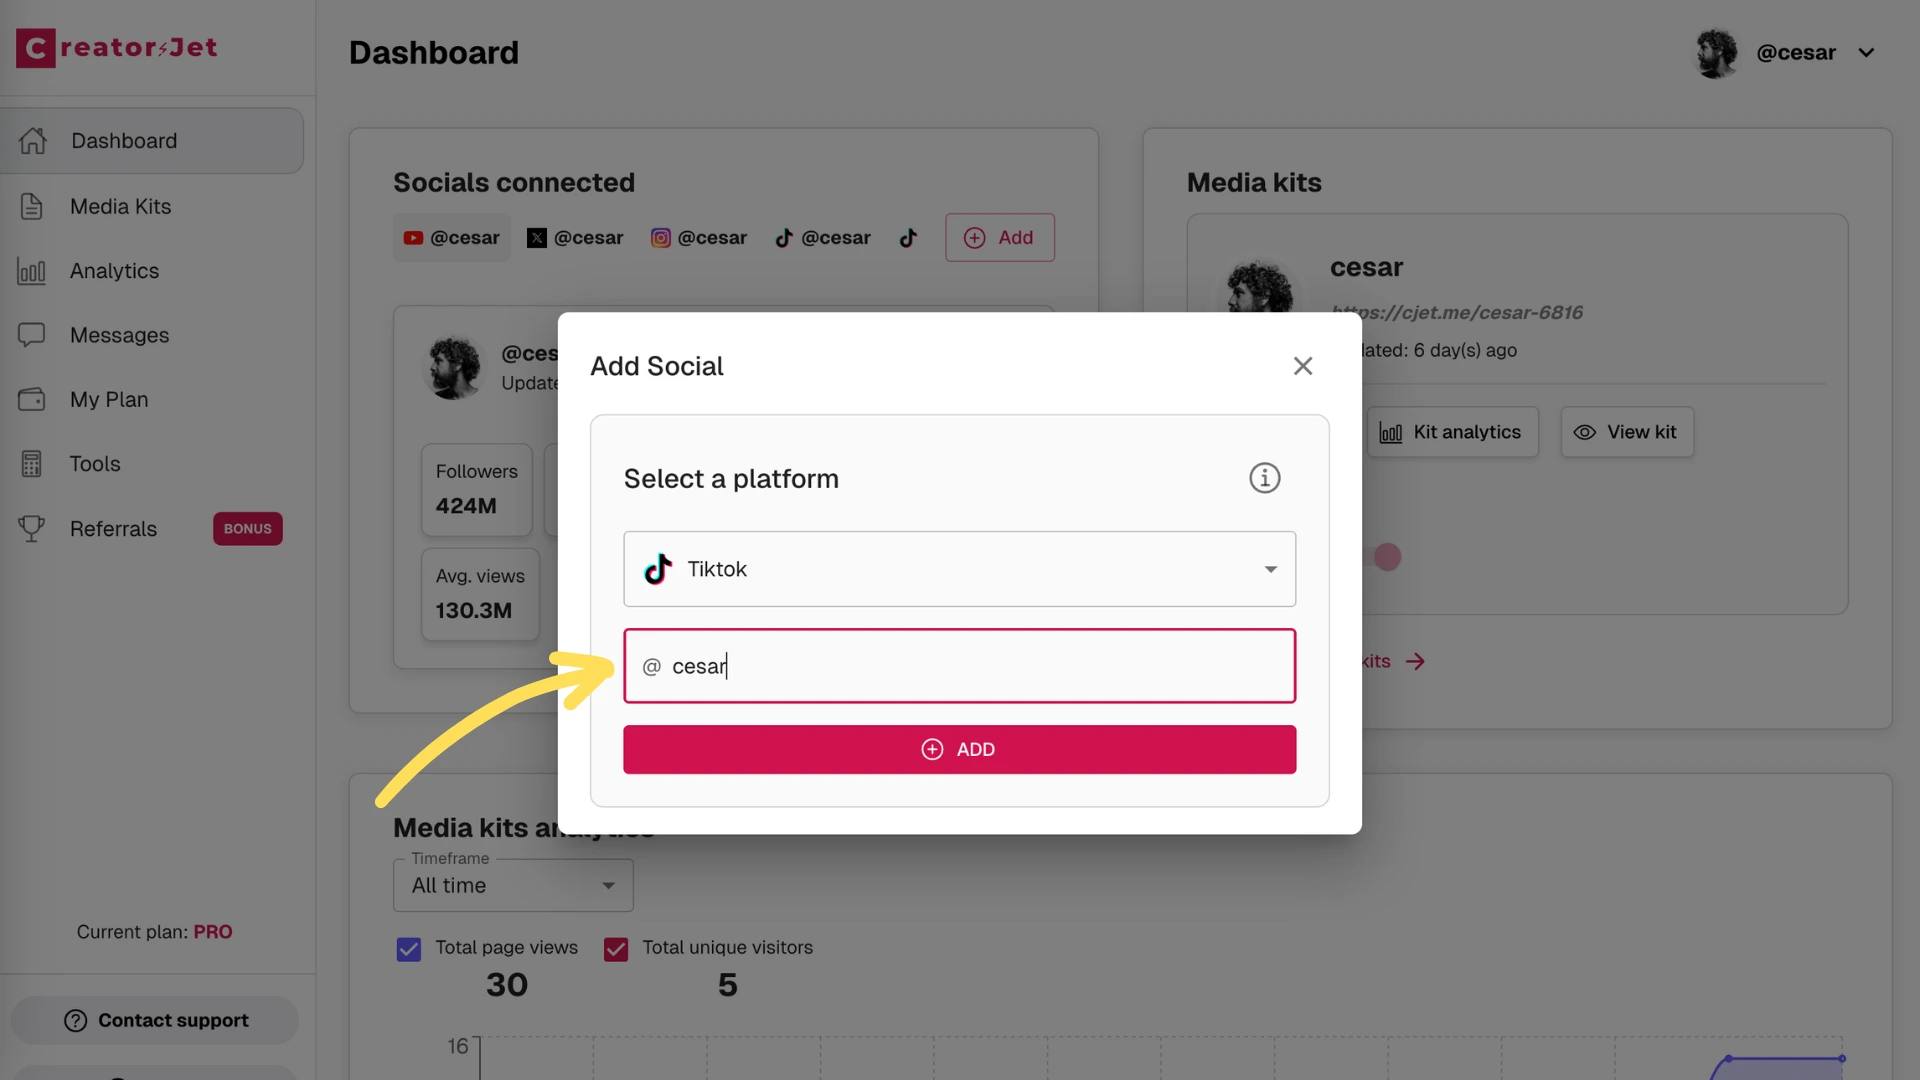
Select the platform, fill in your handle, and click "Add." Your social media account will now be connected to your CreatorsJet profile and available for your influencer media kit.
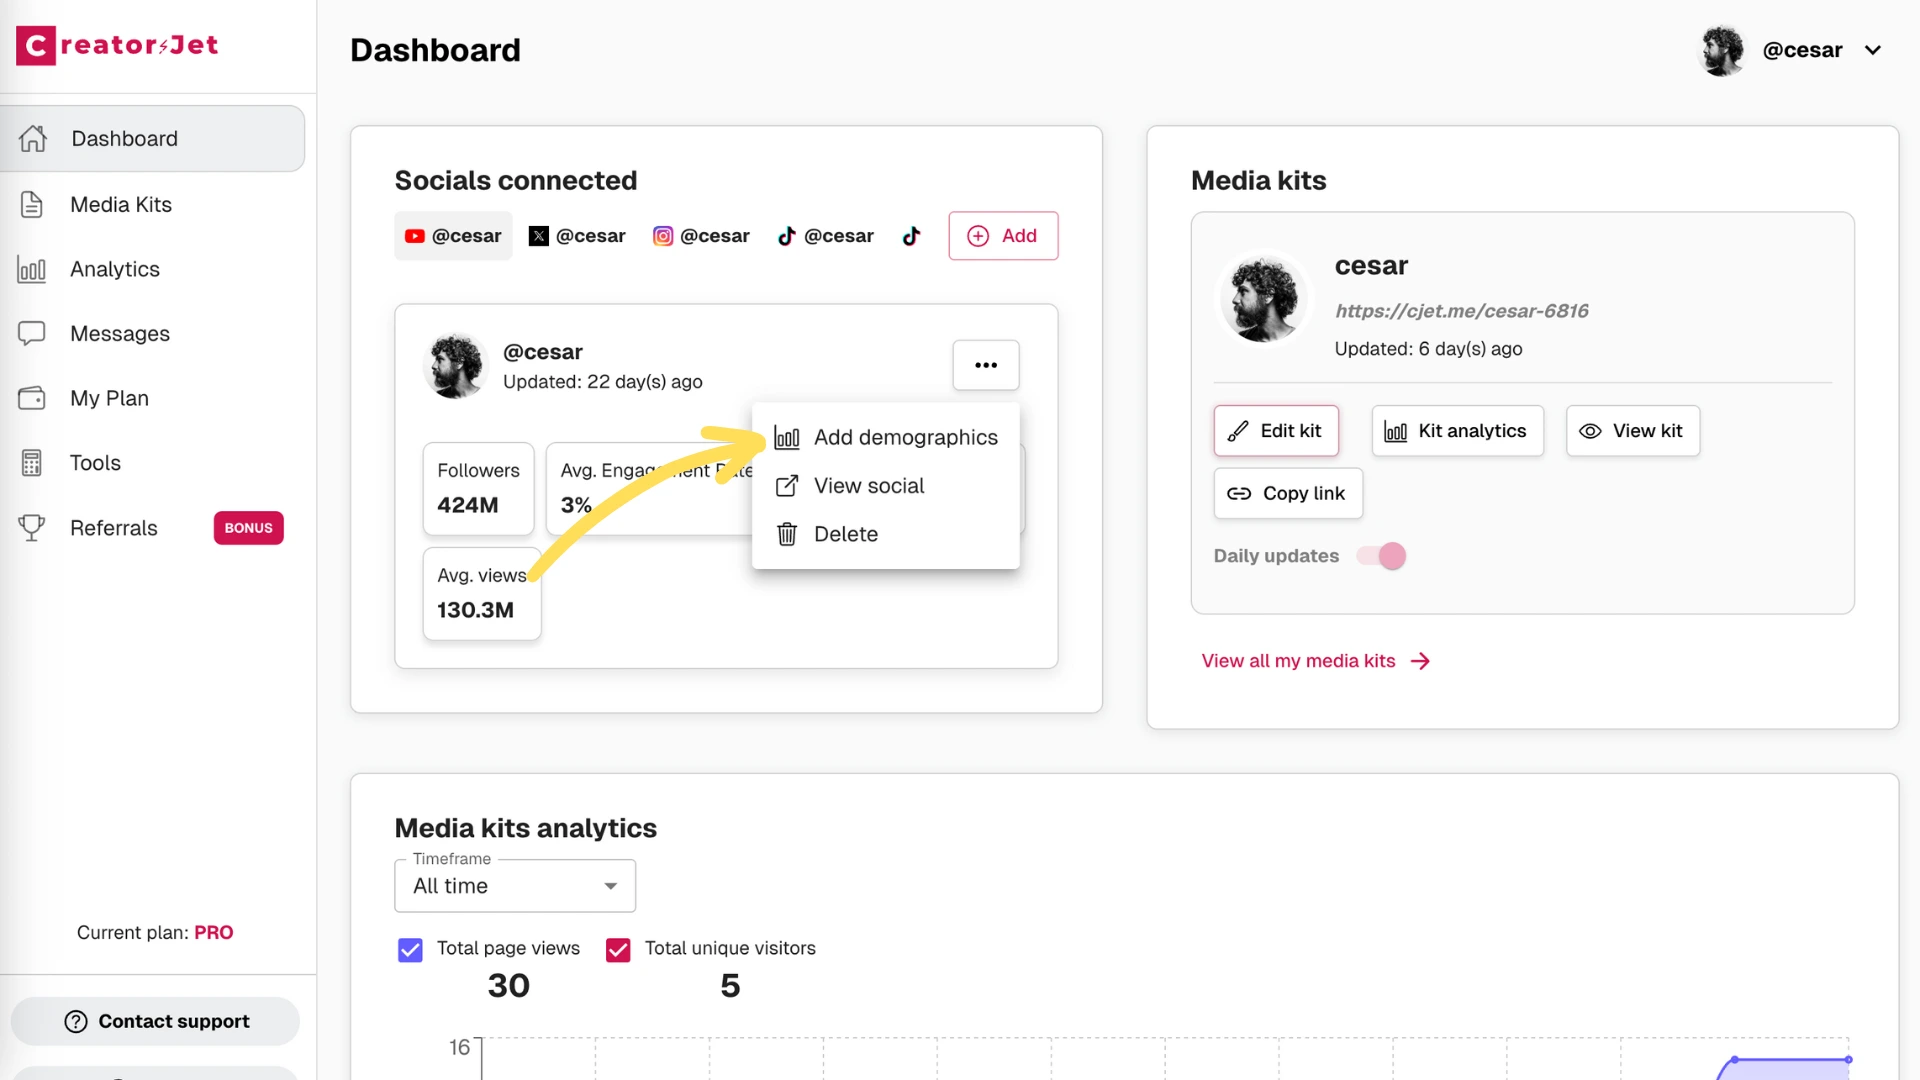
To provide granular details about your audience, including geographic location, age ranges, and gender distribution, simply click the edit icon next to each connected social account.
Step 4: Edit Your Media Kit
Now that you’ve linked your accounts, it’s time to edit your influencer media kit. Go to the "Media Kits" section in the sidebar to view and manage your kits.
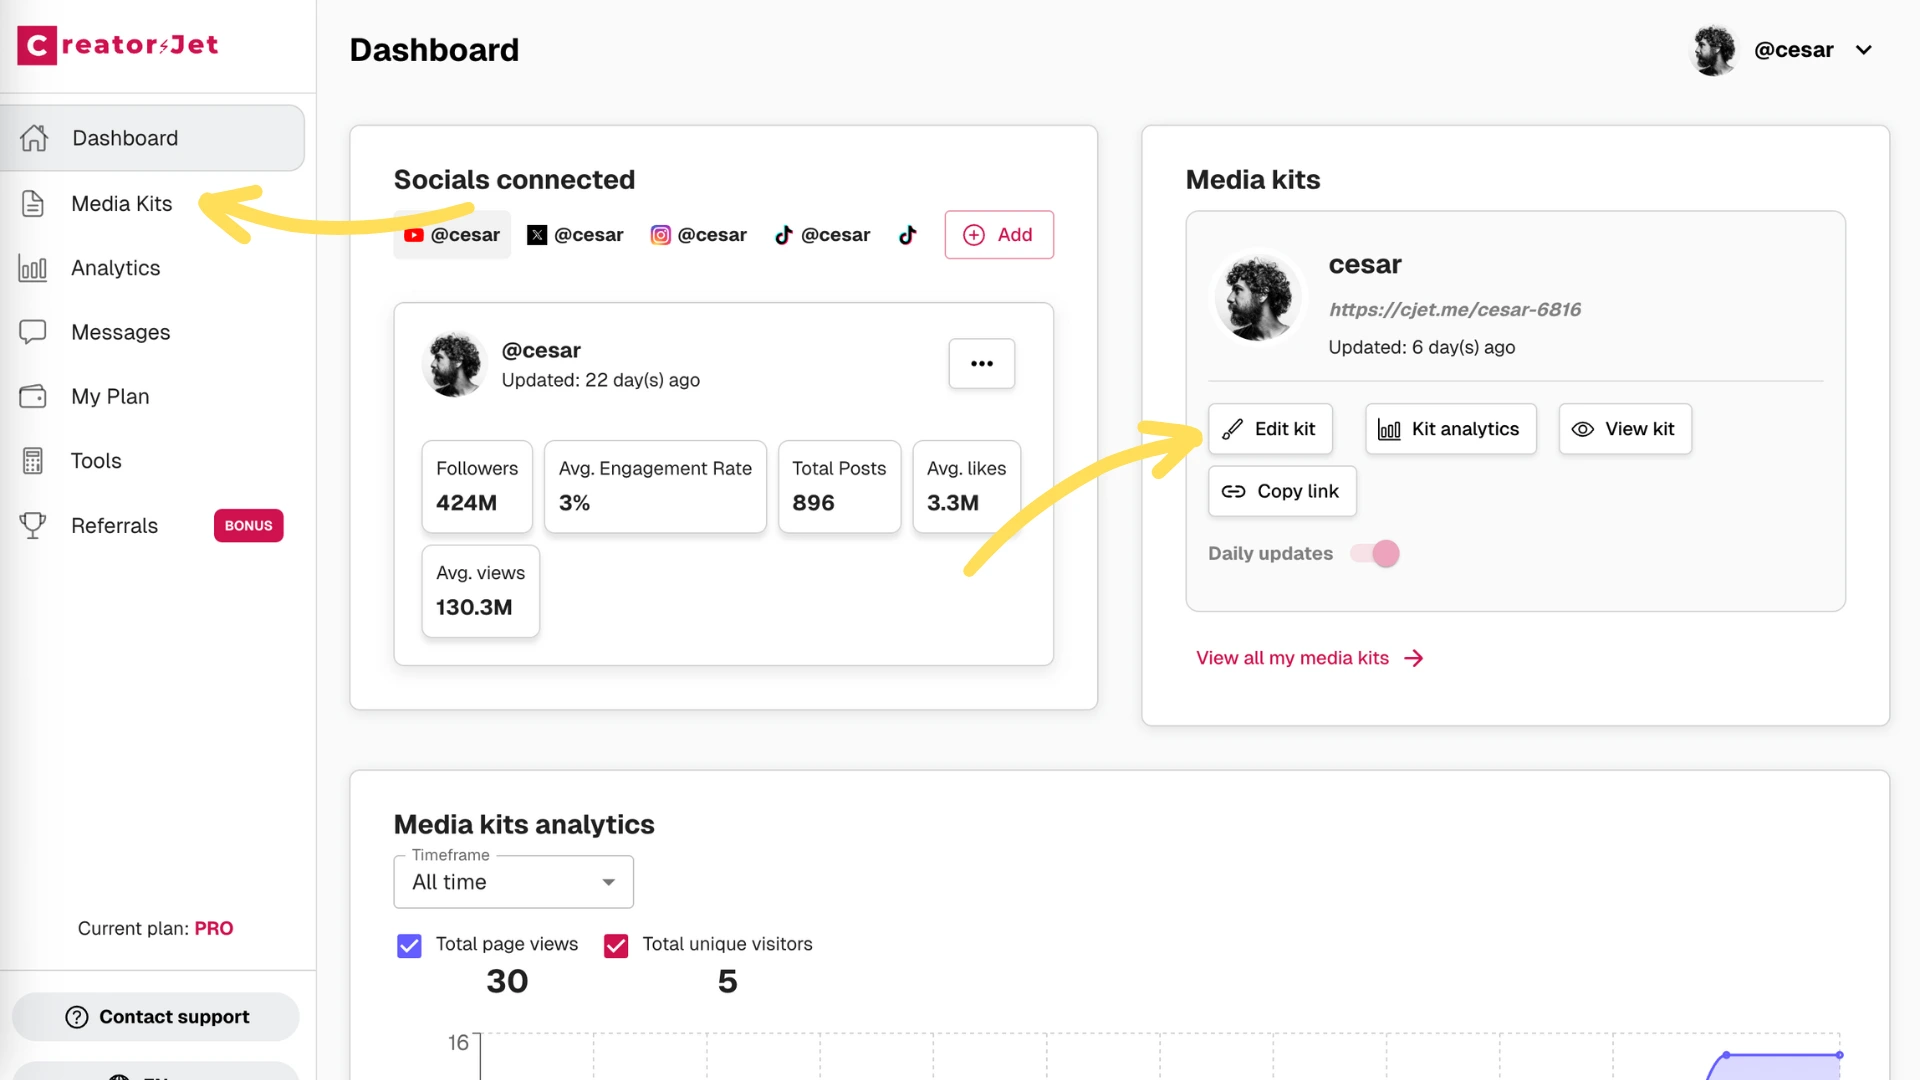
From the Media Kits section, select the kit you want to edit and use the available options to customize its details and appearance.
You can also create a new kit from this section if you want to set up another influencer media kit.
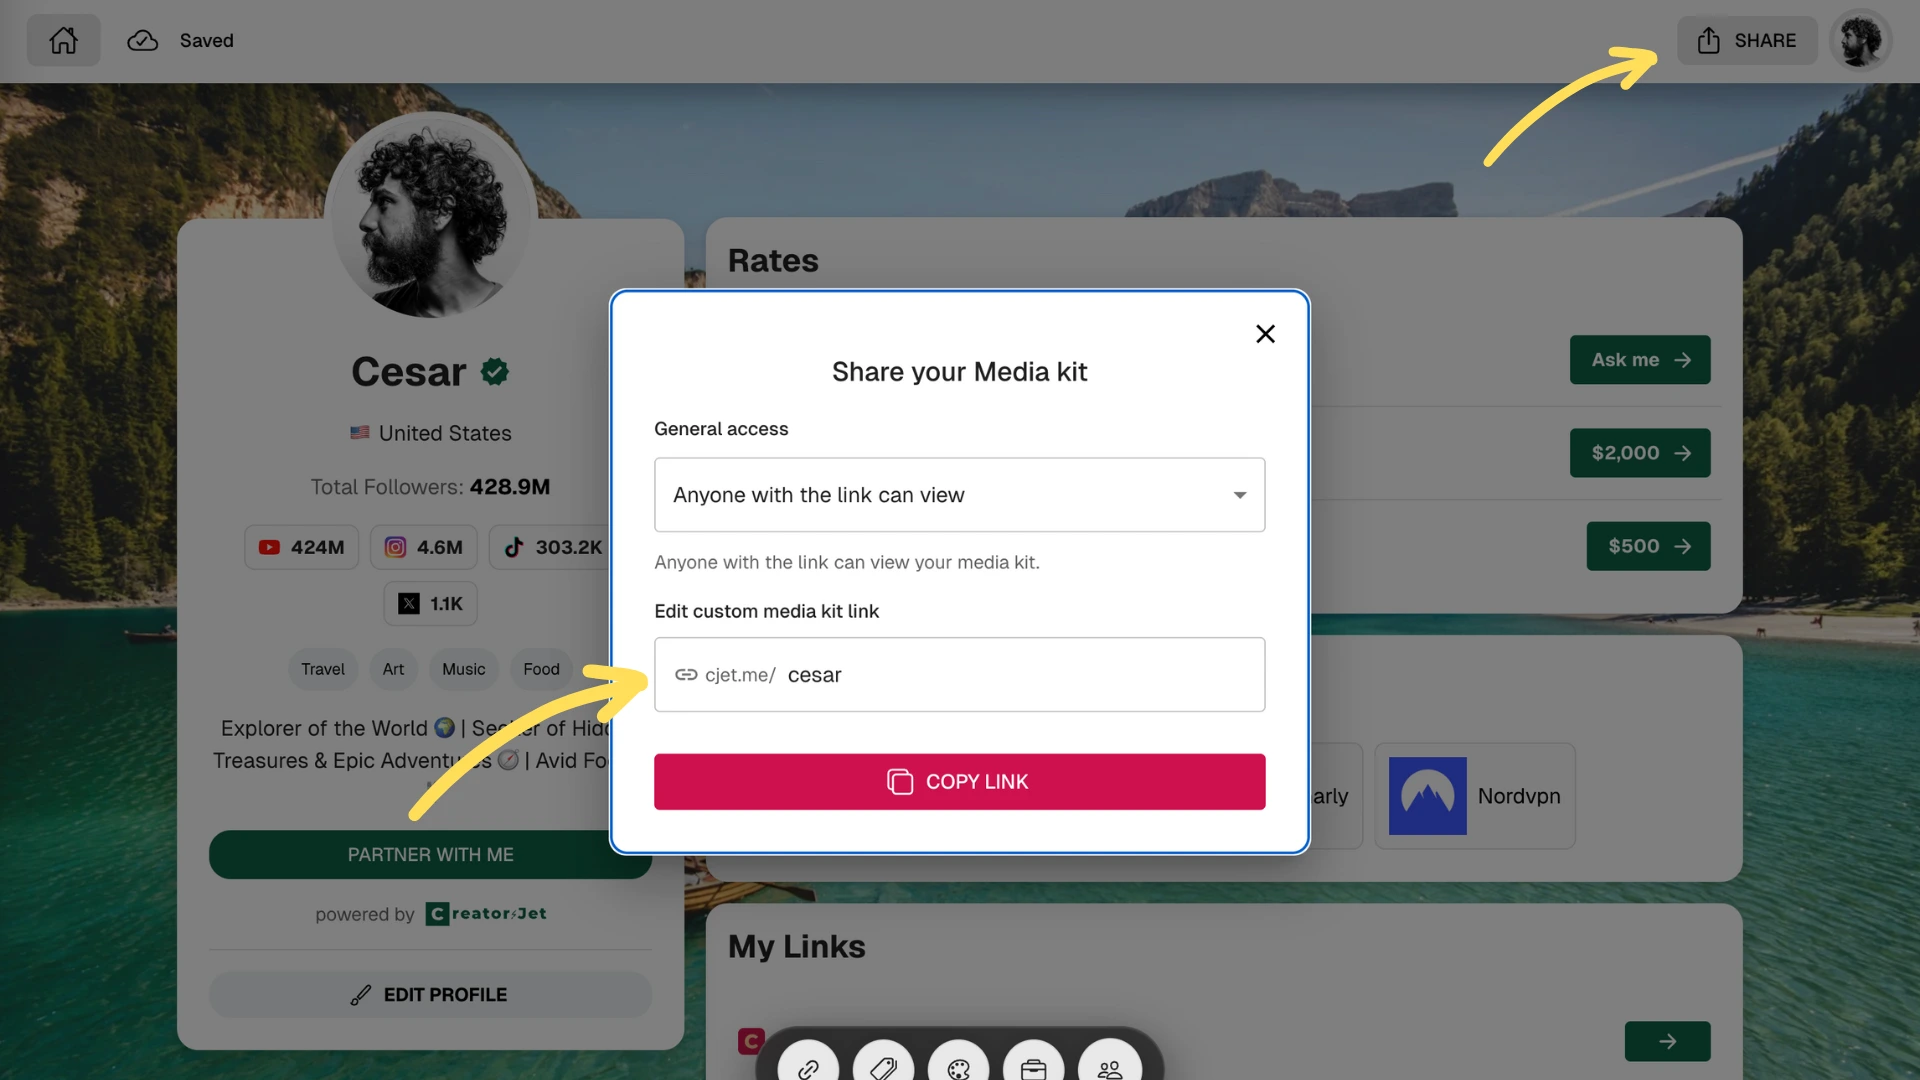
Step 5: Customize your link
Choose a short, memorable slug that matches your identity.
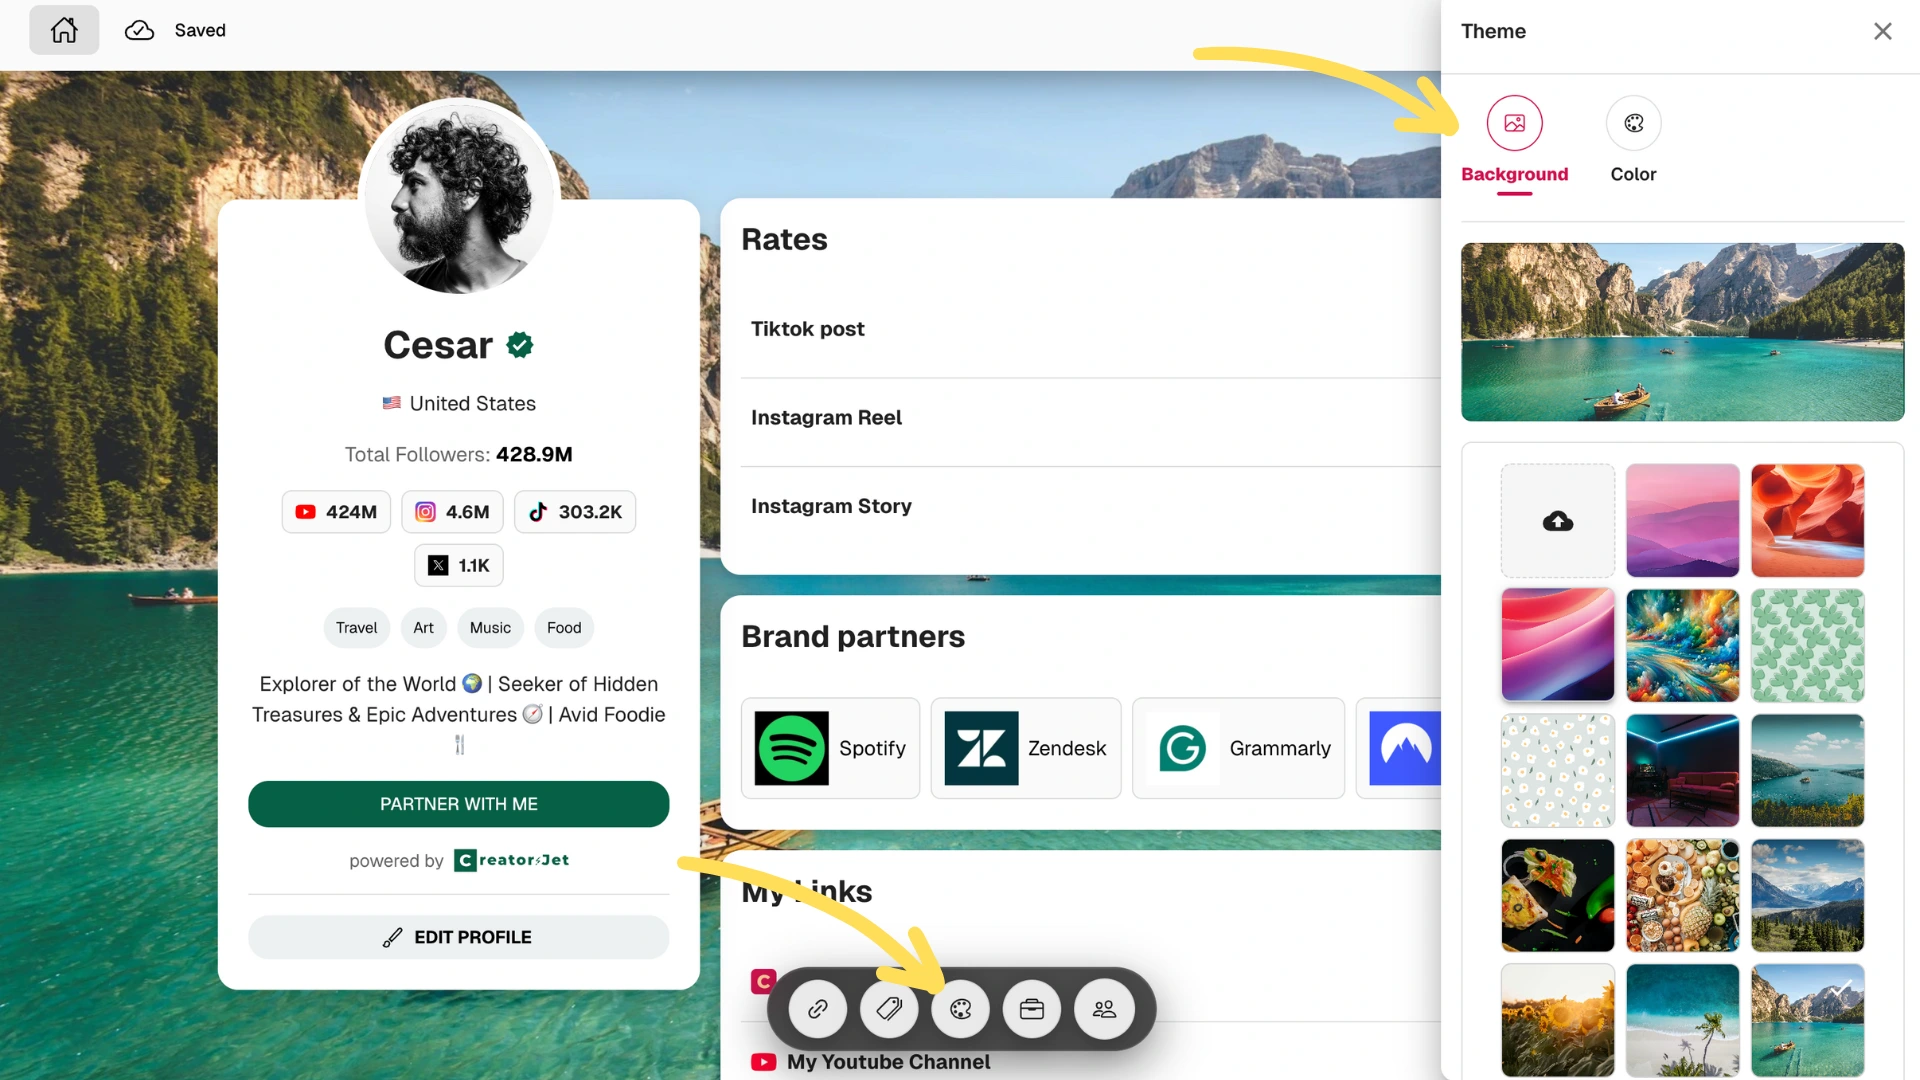
Step 6: Edit theme
Adjust colors, backgrounds, and layout to match your style.
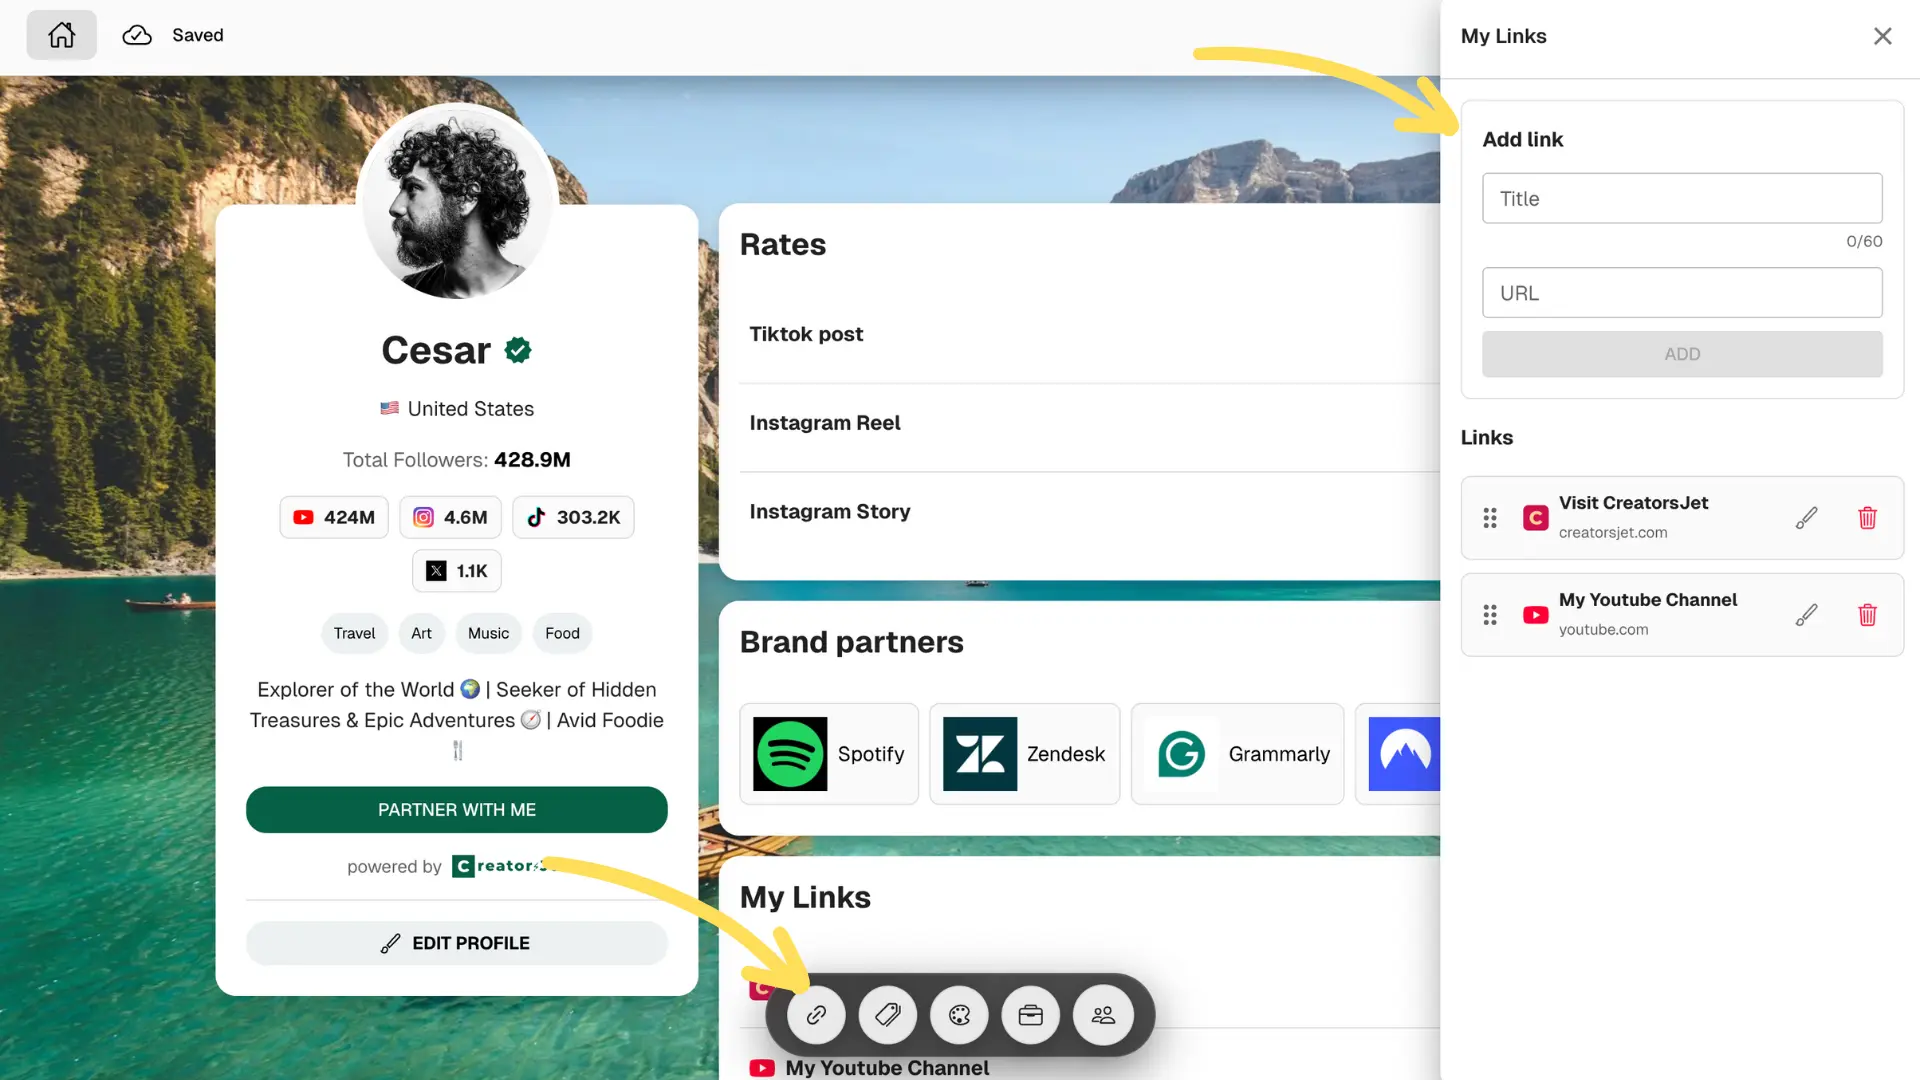
Step 7: Edit links
Add or remove links to your platforms, website, and collaborations.
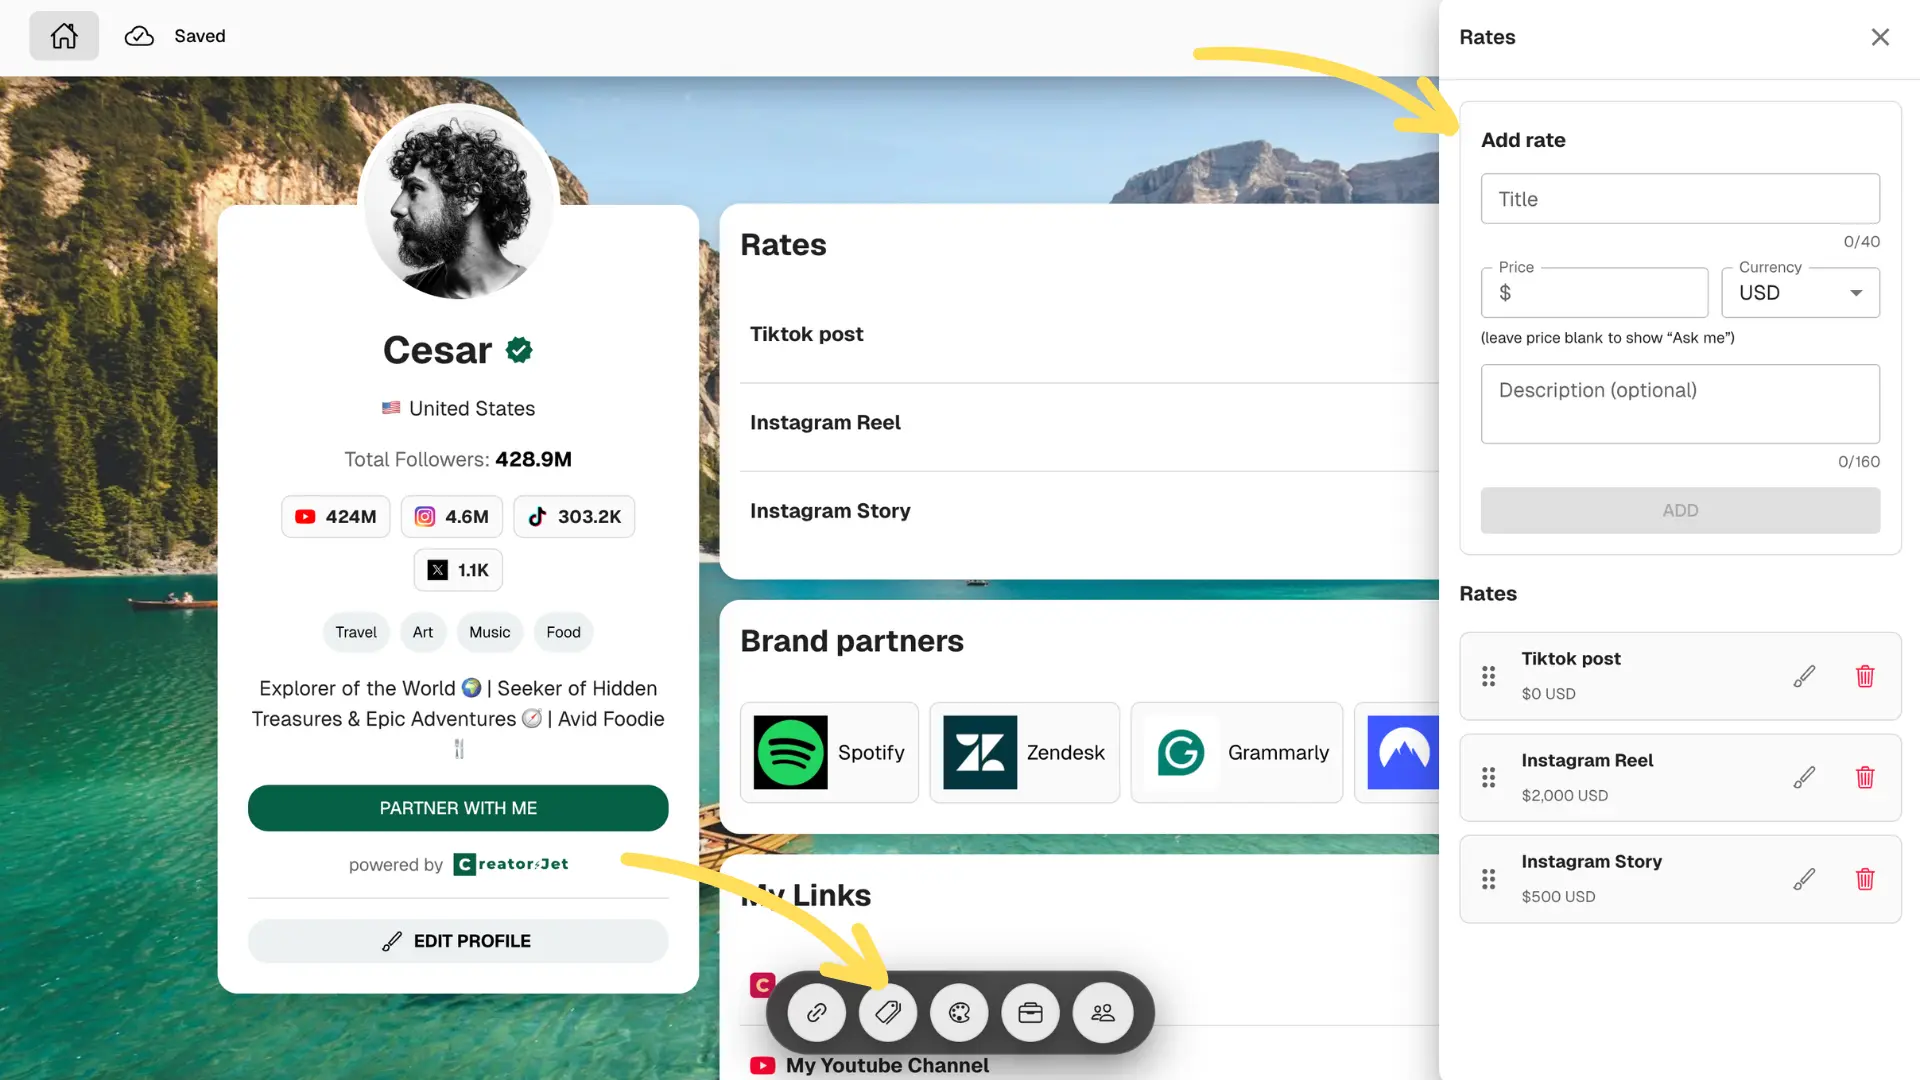
Step 8: Edit rates
List your services and rates to make brand requests easier.
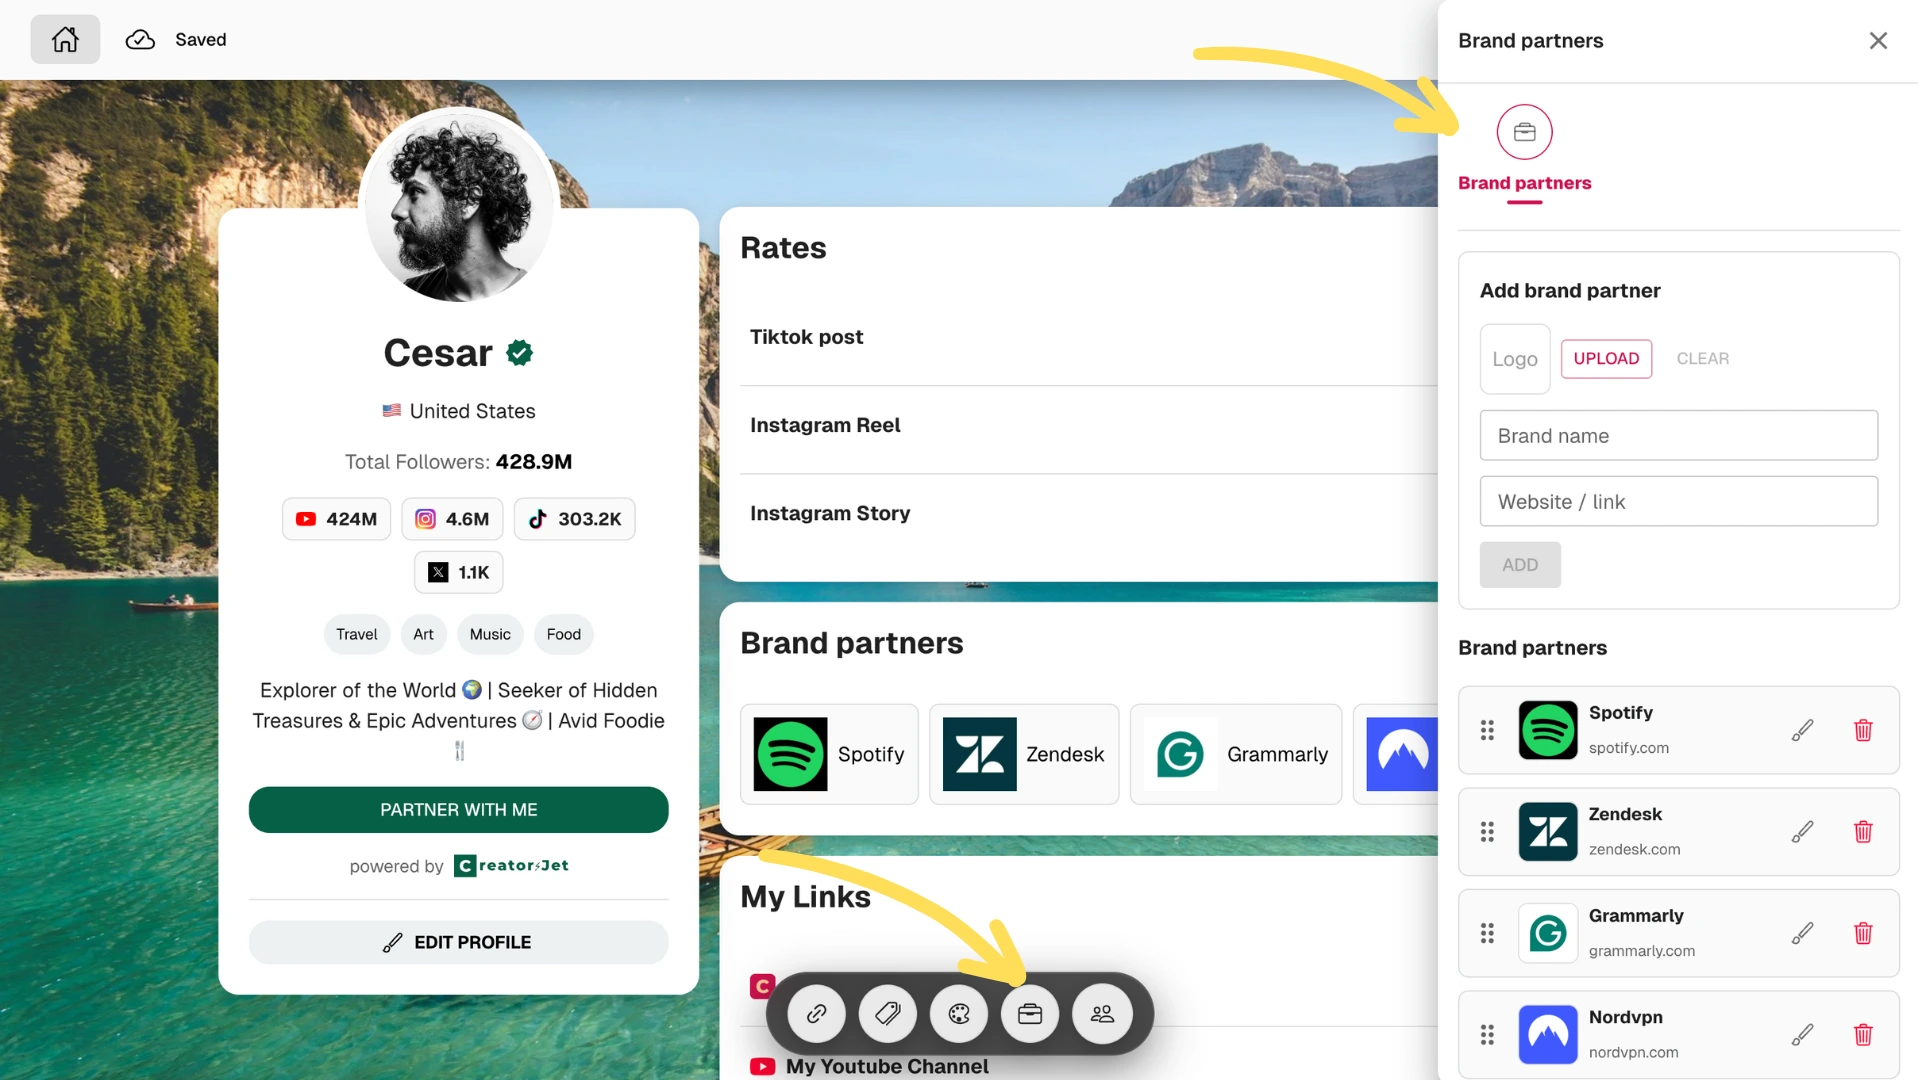
Step 9: Add brand partners
Showcase past partnerships and logos to build credibility.
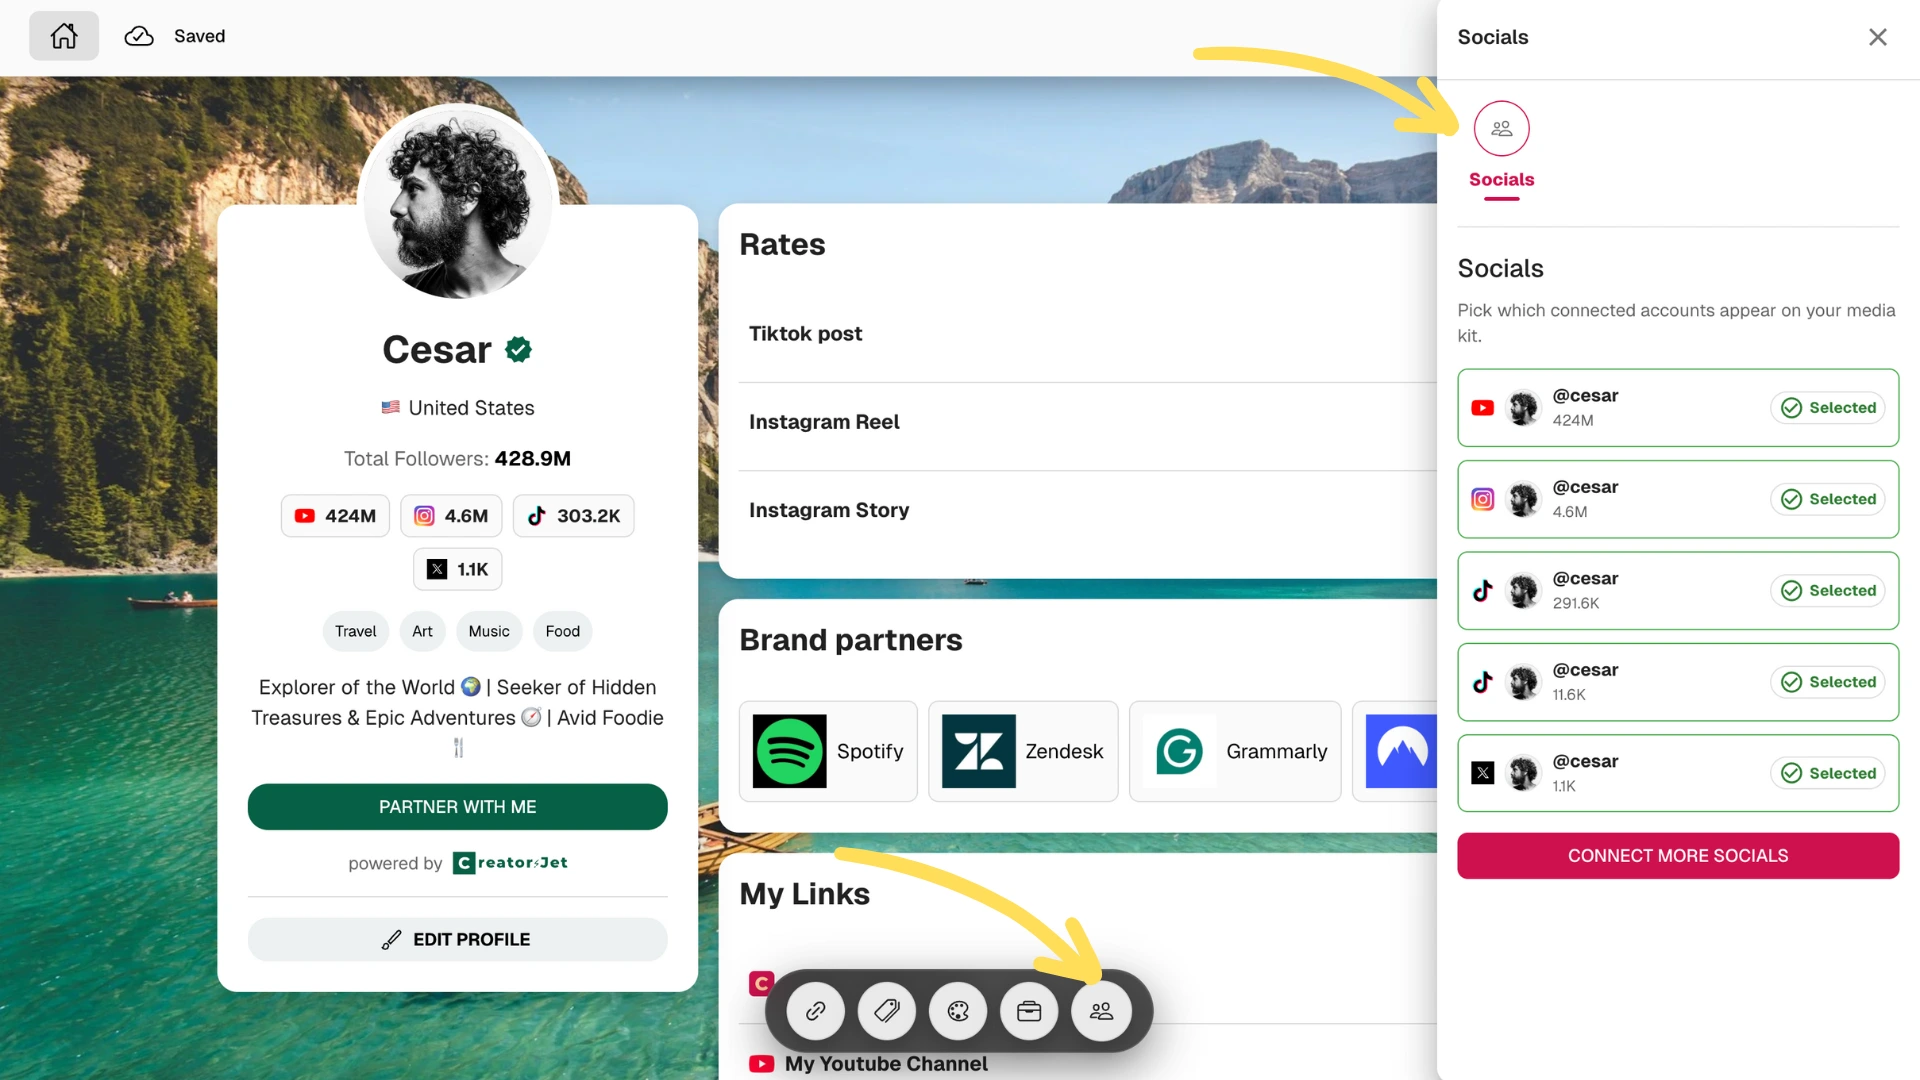
Step 10: Manage your socials
Connect accounts to display always-up-to-date stats automatically.
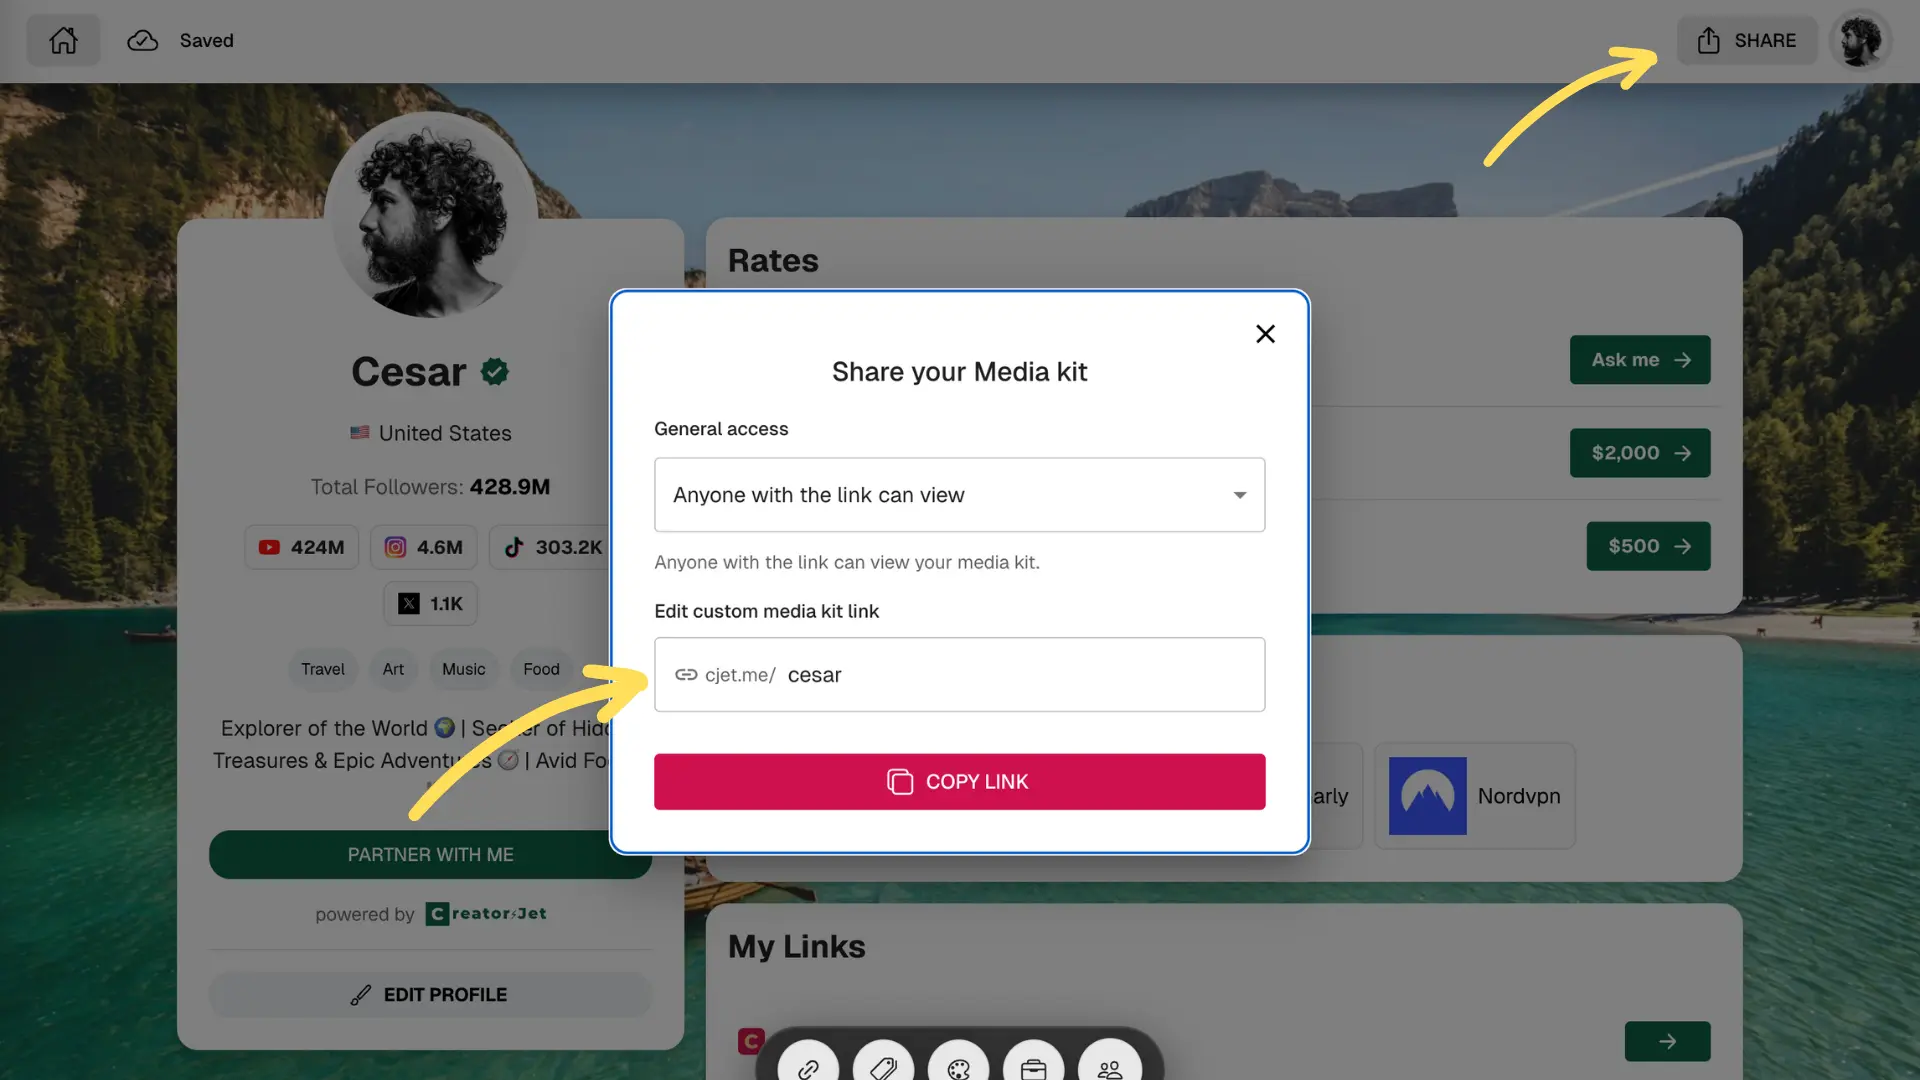
Step 11: Share your kit
Copy your public link and send it to brands in one click.
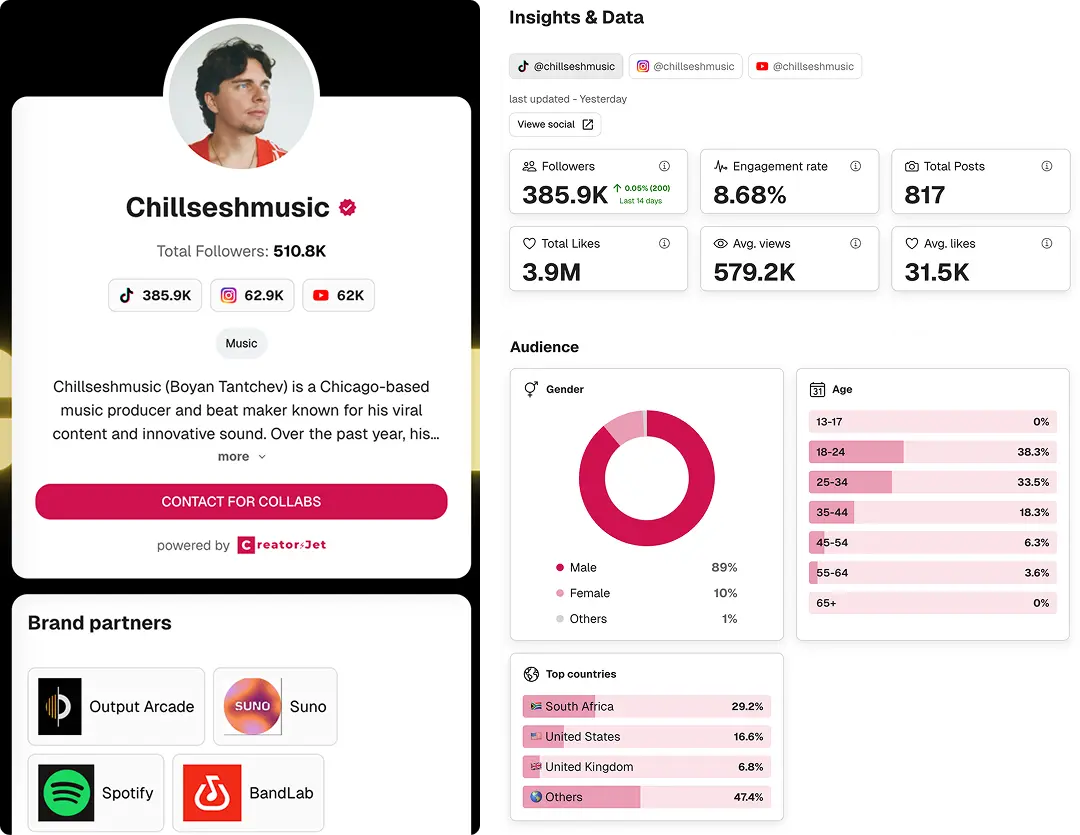
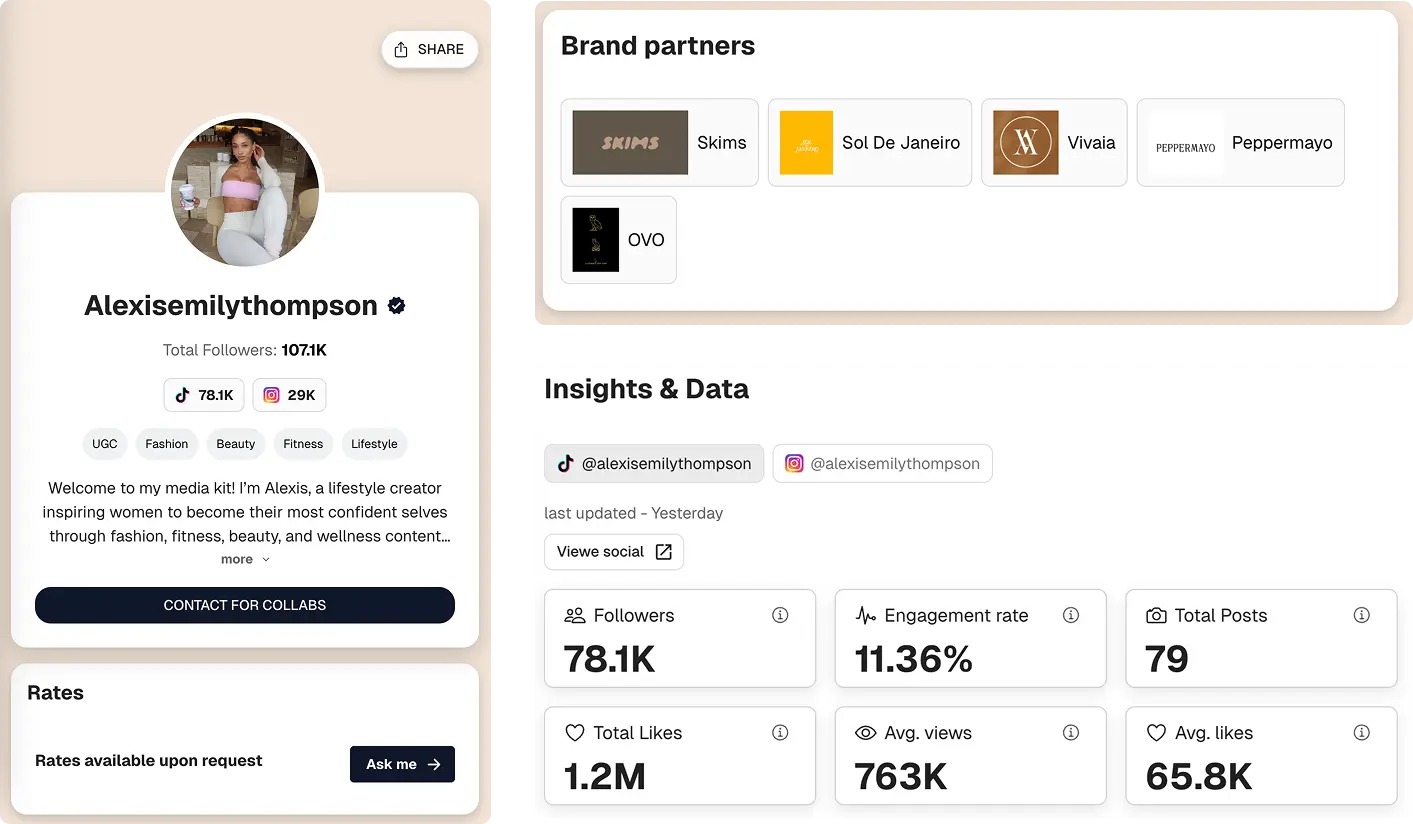
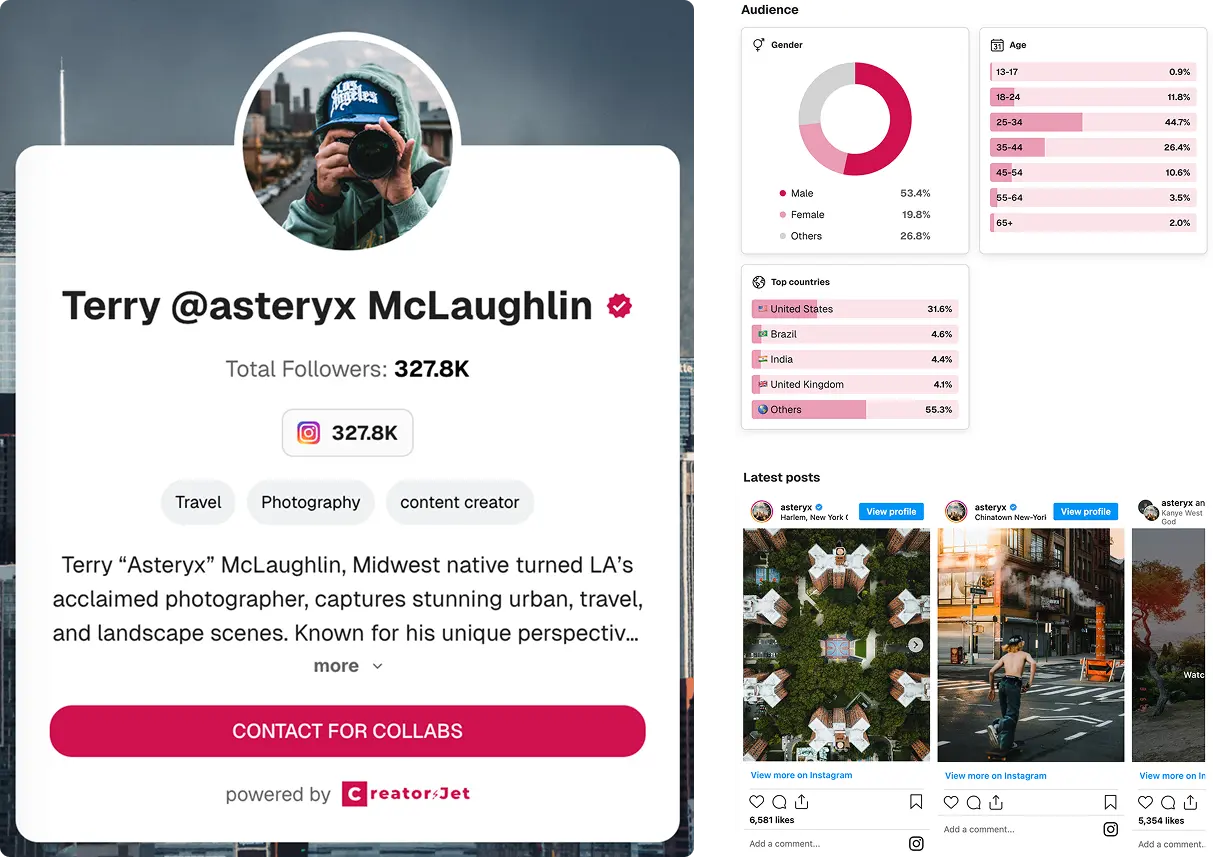
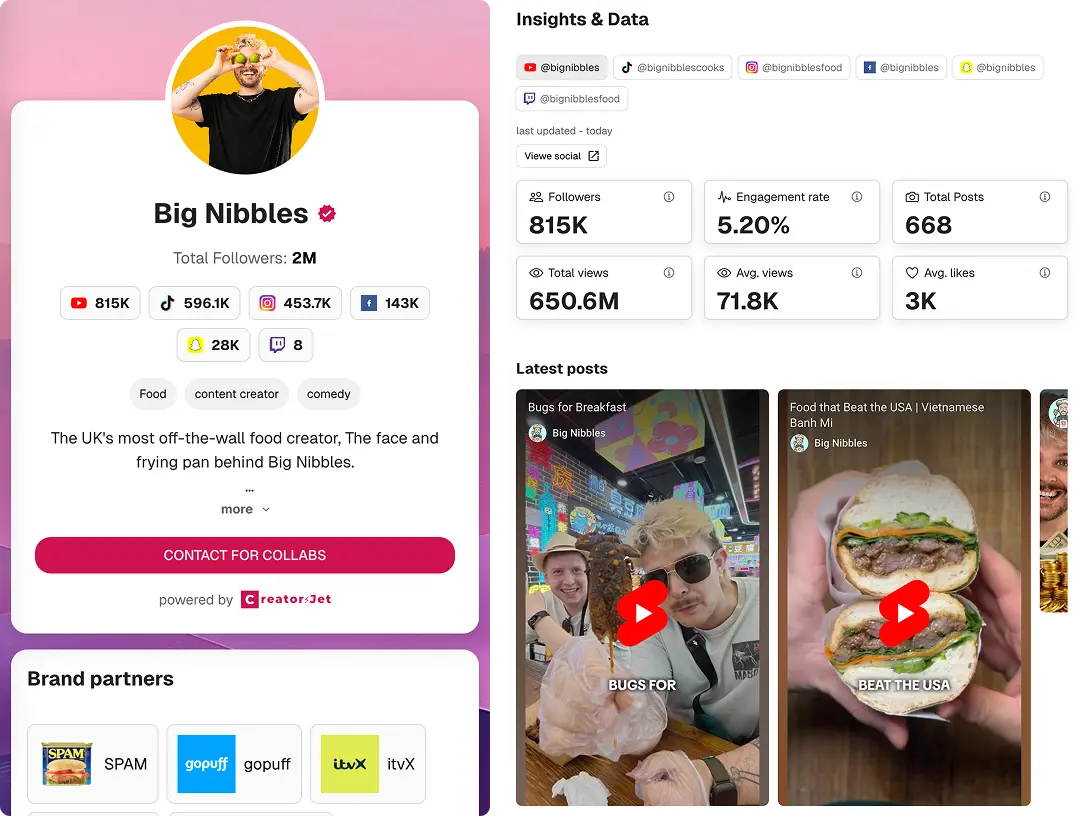
Real influencer media kit examples
See real influencer media kit examples built with CreatorsJet, complete with audience metrics, brand collaborations, and polished visuals, to inspire your own high-converting media kit.
How to Send Your Influencer Media Kit to Brands
Cold Pitching Best Practices
Personalize each outreach by referencing a recent campaign and clearly explaining why your audience aligns with the brand. Keep your message concise (5–7 sentences) and share your media kit link instead of attaching screenshots or long explanations.
Email Templates That Work
Lead with value, such as a campaign idea or a clear audience match. Include your media kit link, one strong proof point, and a simple CTA like: “Open to a quick call next week?” Keep subject lines short, specific, and relevant.
Follow-Up Strategy
If you don’t hear back, follow up after 5–7 business days with a new angle. This could be a recent result, updated metric, or a lighter ask. Stop after three touchpoints to avoid inbox fatigue and protect your reputation.
Influencer Media Kit Tools & Templates
CreatorsJet
Build a live, link-based media kit that updates your metrics automatically, showcases case studies and collaborations, and is ready to share in one click.
Canva Templates
Useful for quick visual layouts and design flexibility. Export to PDF, but make sure file size stays reasonable and metrics are kept up to date manually.
Notion Templates
Practical for modular sections and easy editing. Public links work well, but lock pages you don’t want accidentally changed or shared.
PDF vs Link-Based Media Kits
PDFs are easy to share offline but become outdated quickly. Link-based media kits stay current, mobile-friendly, and trackable. Use PDFs as a backup, and links as your primary format.
Influencer Media Kit FAQ
- Do I need a media kit if I’m a nano or micro creator?
- Yes. Brands care about fit and engagement, not just follower count. A concise kit makes you look organized and easy to book.
- Should I include my rates?
- If your rates are consistent, include a starting price or packages. If you price custom, invite brands to request a tailored quote.
- How often should I update my media kit?
- Update monthly or after notable wins (viral post, major collab, metric jump). Outdated stats erode trust.
- How long should a media kit be?
- Aim for 2–4 pages or a single scannable page online. Prioritize clarity and proof over volume.
- Is a PDF enough?
- Keep a PDF for attachments, but send a live link so brands always see current metrics and can share easily.
- What’s the best way to track who views my kit?
- Use a link-based kit with analytics or trackable links in your outreach so you know when brands engage.
As a special thank you for reading through, use the exclusive promo code "CREATEMEDIAKIT" at checkout to enjoy a discount on your first CreatorsJet subscription.
Create your customized media kit effortlessly with CreatorsJet
Stand out in the crowded influencer market with a professionally designed media kit from CreatorsJet. Seamlessly showcase your social media analytics, audience insights, and collaboration details with one click.
🚀 Create your professional media kit in minutes
✅ Automatically updated
💬 Share with just a click
free forever, with no credit card required.
